VFX Tutorial
| Visual effect topics |
|---|
PDF Version Part 1 File:VFX Tut p1.pdf
PDF Version Part 2 File:VFX Tut p2.pdf
PDF Version Part 3 File:VFX Tut p3.pdf
Contents
VFX Tutorial Part 1
This tutorial is to get you started in creating your own visual effects to be used in the DA toolset. Tutorial #1 will cover the basics of creating, editing, and implementing the visual effect.
Creating a new visual effect
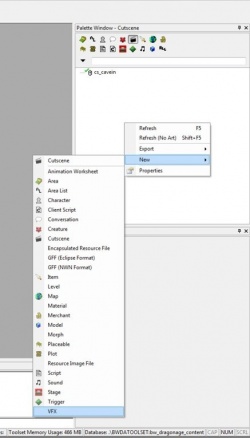
To create a new VFX, right click on the palette window and select “NEW > VFX”
The VFX Editor will open up showing a square grid and a “Select VFX” window in the middle. For this tutorial we will be doing a Placeable effect, so select “Placeable” and click “OK”.
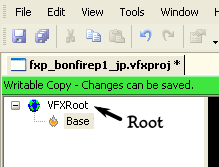
On the top left, you should see a little globe called “VFXRoot” and in the Object Inspector you should see the properties of VFXRoot. At this point, save your work by selecting “File > Save As” or clicking the Save Icon in the upper left. You will be prompted for a file name. I like to keep all of my VFX files in one place so in My Documents/Bioware/Dragon Age folder I created a VFX folder to save my files.
For this tutorial we will be creating a bonfire type of effect and to stay with Dragon Age Naming conventions, we will use a 3 letter prefix, underscore, and then the file name. Name the file “fxp_bonfire_jp” The “fxp” is for “Visual Effect Placeable” (all VFX files start with fx*) “bonfire” tells me what the effect is, and the “jp” on the end lets me know that it is my effect and not someone else’s, you can add whatever suffix you want. Click “Save” when done.
You can close the toolset at any time and return to this tutorial. You can open your effect again later by selecting “File > Open” and navigate to and select the file you just saved.
VFX root properties
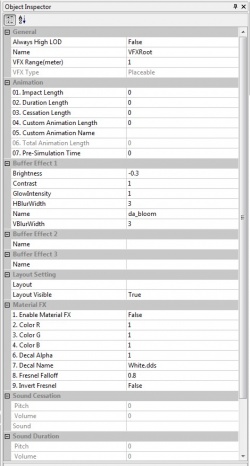
VFXRoot Properties: I’ll just cover the ones that we will be using.
Name: This is the resource name and is what will be used when we Post to Local. Change it to match the file name.
Impact Length: Time in seconds for the stating phase of the effect. Example, a Runner starting off from the start line reaching max speed.
Duration Length: Time in seconds for the duration of the effect. Example, the time it takes the runner to reach the finish line after reaching max speed.
Cessation Length: Time in seconds for the ending of the effect. Example, the runner slowing down after crossing the finish line.
We are making a bonfire effect, so we want the fire to start off small, grow in size, then burn itself out. So set the Impact Length to 3 seconds, this will start the fire and grown to its max size. Set the Duration Length to 3 seconds. This will allow us plenty of time to vary the coloration of the flames. Set the Cessation time to 3 seconds as well, as the fire burns out.
You may be thinking that 9 seconds is a very short fire. When the effect is set in a script, the duration time is set within the function ApplyEffect*. This duration time causes the duration time of the animation to loop over and over. So for example, if this bon fire effect is applied to an object for 6 min, the duration part of the effect will loop 120 times, 3 second duration * 120 loops = 360 seconds = 6 minutes. Then the Cessation time plays and the effect is done.
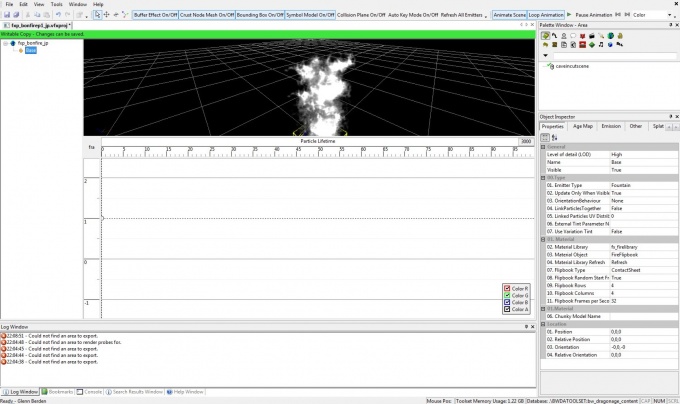
After setting these times, you should now see a time line something like this, More on this in part 2.
Adding an emitter
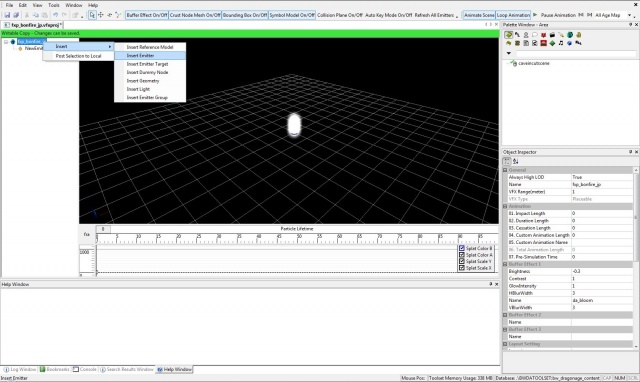
Next we need an emitter. Right click on the window and select “Insert > Insert Emitter”. You should get a pulsating white capsule in the center of the grid and a “NewEmitter” object added to the list on the left.
Select the NewEmitter object and you will see the properties in the Object inspector window.
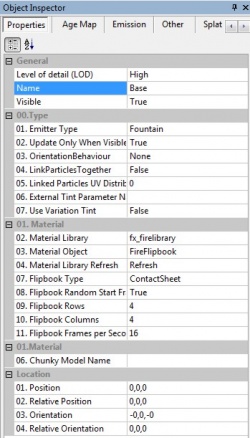
Properties Window:
Name: Change the name of the emitter to “Base” this will be the main base of the fire. Naming the emitter will help sort them out when building an effect with several emitters.
Material Library: This is the library that we will be selecting our particle material from. The DA Effect Libraries start with the prefix fx_*Click on the Material Library box to open the resource window. Select the fx_firelibrary and click OK.
Material Object: This is the martial that we will use from the above selected Library. For this select “FireFlipbook”. Before we continue, save your work and let’s talk about Flipbooks.
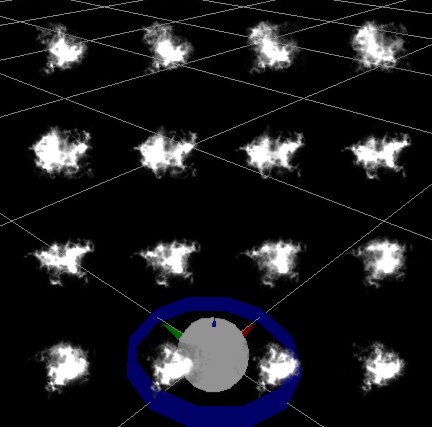
A flipbook is a particle that consists of columns and rows of varying images. The animation is created by the effect rapidly flipping through each image, much like a cartoon animation. At this point you should see 4 columns of flickering flames. Note that not all particles are in flipbook form, some are a static image. A simple way to see if the particle is a flipbook, and to see how many columns and rows there are is to set the Birth Rate to 1. Click on the “Emission” tab in the Object Properties and change the top parameter “Birth Rate” to 1. You should now see an image that consists of 4 rows and 4 columns of small flame images. This is a single particle, 4x4 flipbook. Set the Birth Rate back to 10, and return to the “Properties” tab of the Object Inspector, more on Birth Rate later.
Flipbook Type: Select “ContactSheet”.
Flipbook Random Start Frame: This selects a random frame within the flipbook to start with on each emission. Set this to TRUE. This will help give us diversity and make the flame look more “real”.
Flipbook Rows: This is how many Rows there are in the flipbook, set this number to 4.
Flipbook Columns: This is the number of Columns in the flipbook, set this to 4 also.
Flipbook Frames per Second: The particle image has 4 rows and 4 colunms, there are 16 total images to flip through. This value should be a factor of Rows and Columns, so 4 x 4 = 16. Set this value to at least 16 flips per second.
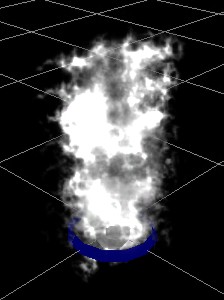
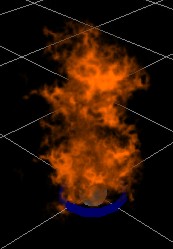
You should now see a single column of what nearly looks like fire. Right now the flames flicker a bit too slow for me, so set the Flipbook Frames per Second to 32. This makes the flames flicker twice as fast because it is now flipping through all 16 images twice per second instead of once. Save your work.
Age Map:
In the Object Inspector click the “Age Map” Tab.
Here we can manipulate the color and the scale of the effect.
Color values are in percentage of 0 to 100% on a scale of 0 to 1, so 50% Blue would be 0.5.
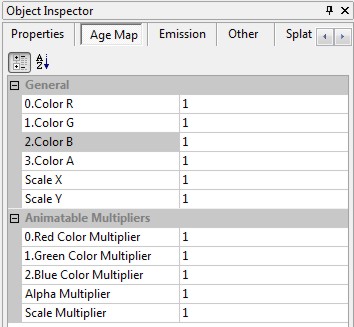
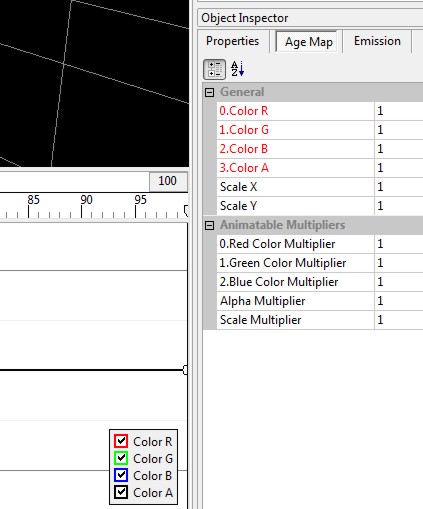
Most normal fires aren’t white, so set Color B (blue) to 0. Your flame should now be yellow. Set Color G (green) to 0.4. We now have a orangey-red color.
Color A (alph) is the flames color intensity setting this to 0.5, the fire is half as intense. Set it where you like.
The scale X and Y values can be any number from 0 to infinity. Setting the scale to 1 is the particles normal size. Because the particle image is a 2d image, there is no Z scale. Changing Scale X will affect the X (width) direction of the flame and Scale Y will affect the Y (Height) direction of the particle. For now we will leave them alone.
The corresponding multipliers simply multiply the values in the general section. For example, if you set Color G back to 1, then set Green Color Multiplier to 0.4 you will have the same result. 1 * 0.4 = 0.4
There is a notable difference between the 2 however, the General settings affect the particles over the lifetime of each particle while the Multipliers affect all the particles over the length of the animation. This will be explored further in Part 2. Go ahead and play with the color settings until you have it the way you want it, and then save your work.
Emissions
Now click on the “Emission” tab these settings control the particle emissions.
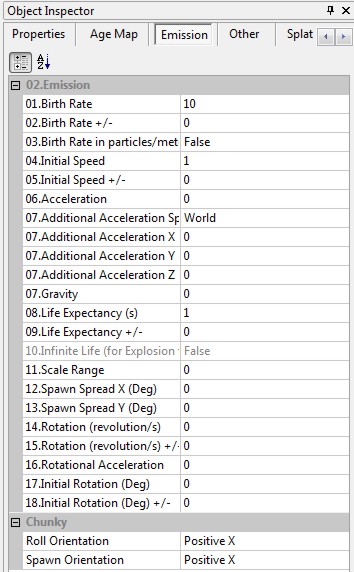
Birth Rate: This is how many particle emit per second. The default is 10, which works out for the fire pretty good. However the flicker is pretty static. So we will change that in a minute.
Birth Rate +/-: This setting will cause the particle Birth Rate to randomly vary by a positive number or a negative number. If we set this value to 1, the Birth Rate then will vary between 9 and 11 particles per second. Since a 10 Birth Rate seems to be a good number for the most particles per second, set the +/- value to 2, and change the Birth Rate to 8. This will make the max 10 and the min 6 particles per second.
Initial Speed: This is how fast the particles travel when emitted from the emitter. Changing this value appears to change how long the particles last. However this is not the case, they simple move further before the particle life has expired.
Initial Speed +/-: This setting works the same as the Birth Rate +/- setting but instead affects the Initial Speed. Set this value to 0.5 which will now give the particles a varying speed between 0.5 and 1.5.
Life Expectancy (s): This is how long each particle last, in seconds, before vanishing.
Life Expectancy +/-: Again is a random variance to the value set in Life Expectancy. Set this value to 0.5, making the particle last longer and shorter as the fire burns.
Scale Range: This adds a random variance to the size of the particle much like the other +/- settings. Set this to 0. 6. You should now see the flame vary in size as it emits from the base emitter.
Play with these settings a bit to get familiar with them. In the end you should have a raging fire animation. When you are happy, save your work.
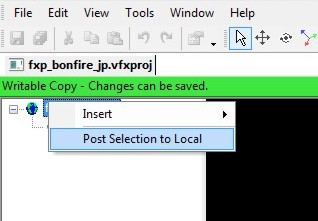
Getting the effect in game: Right click on the Root and select “Post to Local”. You'll find the new VFX under the model palette. It can be placed directly in the level editor or the cutscene editor but not the area editor. You can also add the effect dynamically to an area using a script.
Notes: Because an effect is Art work, at present will not be included with a Builder to Builder Create and must be sent separately. Scripting examples to come later once there is a client to test for accuracy.
So now you have a raging fire. In part 2 of this tutorial, we will make this fire dance and sing. Part 2 will introduce using the time line settings to vary coloration, scale, size and other more advanced settings as well as explore some of the settings introduced here a bit deeper. Keep the bonfire effect you created with this tutorial, we will need it in the second part. The bonfire effect can also be downloaded from the social site.
VFX Tutorial Part 2
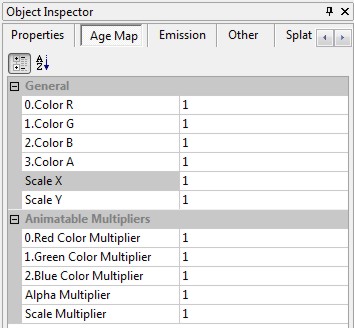
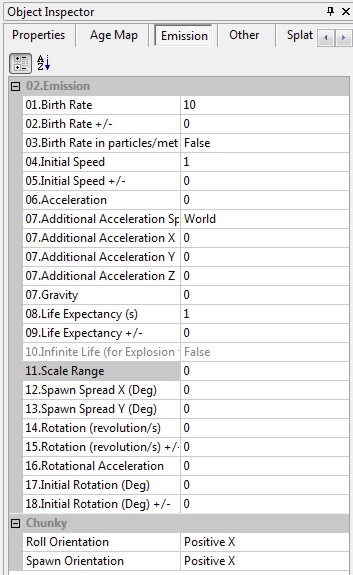
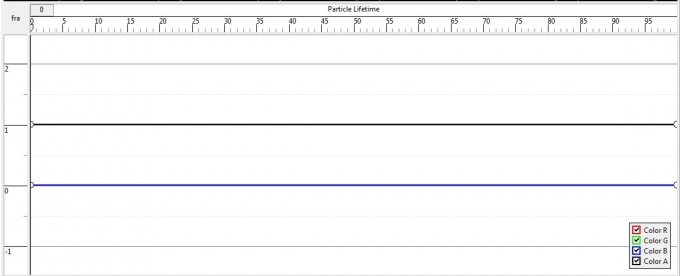
In tutorial #1 we created a good bonfire as a base and up until now we only changed the values directly in the properties on the effect. As we can see this works well for simple effects. Changing the values in this manner alters the effect over its entire life time. We have seen how to change the color and scale of the effect by changing the values in the properties age map. This is great for a basic flame but we want to add more life to it by making the flame vary in color and size over the length of the effect. To start, set all the Values back to default as shown in the 2 pictures below. Note: This tutorial assumes you have read Tutorial #1 or are familiar with the basics of the VFX editor.
Setting any of these values directly will affect the visual over the entire length of the effect. Instead we want to vary these values so the flame will change from reds, yellows, and orange. We also want to change its size during the impact, duration, and cessation phases of the effect. To do this, we will use the time line to set colors and scale so they change over the course of the effect.
Before we continue, we need to make a small change. Select the Root of the effect and in the Object Inspector, change the Impact time to 5 sec and the Cessation time to 8 sec. The 5 sec impact will allow us enough time to see the changes in the flame as it grows and the longer cessation time is for the smoke we will be adding later on.
Select the “Base” object, at the top right corner there is a drop down window, select “Color” from the list. Note, when using the time lines, make sure you have the correct emitter object selected. In this case it is the Base emitter. You should then see a time line like the one below.
Notice at the top of the time line it reads “Particle Lifetime”. This means that the changes we make here will affect each partial over the lifetime of each particle. The lifetime of the particle is directly related to the “Lifetime” value setting in the Emissions Tab, which currently is set to 1 sec.
Parts of the Time line
Control Point: The round dots allow you move the value up, down, left, or right within the time line.
Value Rang: The left side of the time line shows the value range. At this current control point, the value is 1, which is the current value for all 4 colors in the Age map.
Current Value: The dotted line shows the current value any place on the time line. Currently it is set to 1 over the entire length of the particle lifetime. When a control point is added, the line between the 2 control points will become solid.
Visible: This box shows which time lines are visible, the dotted or solid line. You can select or unselect these time lines. Currently all 4 are selected and visible. All 4 also are set at the same value so you only see one control point as all 4 are stacked from top to bottom, Color A being the one on top.
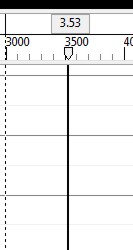
Click inside the time line and you will get a vertical bar. Drag the bar to the far right until the end of the timeline is reached. This bar represents that point in time and I will refer to this bar as the Point bar. Clicking anywhere on the time line will move the point bar to that point in time.
Right click on the time line and select “Add Control Point”. This adds a node at the point in which the point bar and the time line intersects. Also note that the Colors in the age map turn red, this indicates that the values are now controlled by the time line and can vary in value depending on the point in time. Also note that this adds a Control Point to each time line that is visible, so all 4 colors get an added node.
Before we continue, save your work. Next turn the Loop Animation Off by clicking on it at the top right so it is no longer highlighted.
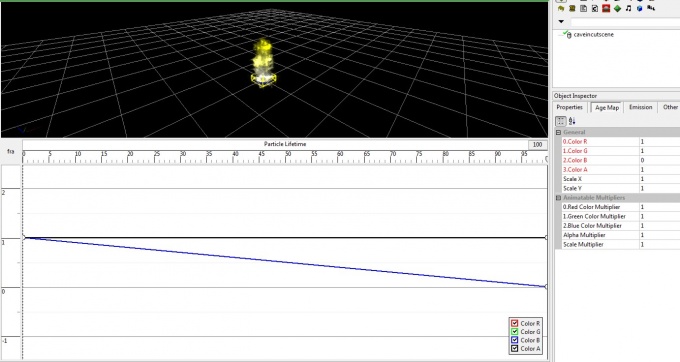
There are 2 ways that we can set the values on the time line, directly in the value box of the Age Map, or by dragging the control points on the time line. To see how it affects the animation, first make sure the point bar is to the far right at 100. Change the value Color B to 0 directly in the Age Map properties, just as we did in Tutorial 1. You should now see a blue line starting at 1 and dropping to 0 at the end of the time line. By changing the value on the Age Map, you affect the control point that intersects with the Point Bar. The Flame should now be white at the bottom and Yellow at the top.
To see what happens to each particle, go to the Emission tab and change the birth rate to 1. You will see the particle start from the emitter as white, and then gradually change to yellow. Set the Birth rate back to 10 and return to the Age Map.
Now move the point bar to the far left on 0. Notice that the value in Color B on the Age Map is again 1. Change this to 0 also and the left most control point will drop to 0 and you time line should now look like this.
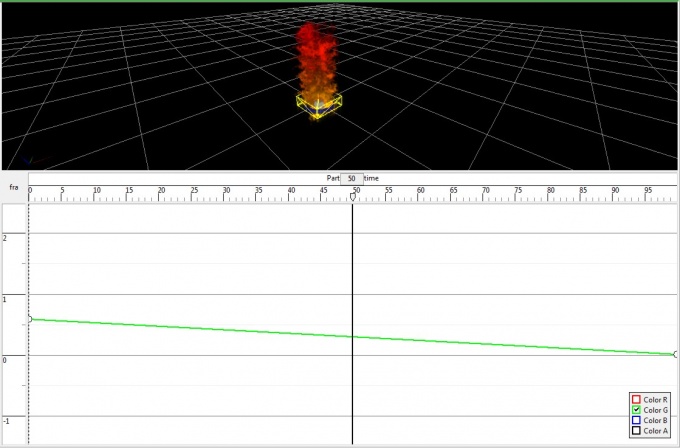
The small box in the lower right corner in the above image indicates which time lines are visible. Right now all 4 colors are visible on the time line. Next we will affect the green color by dragging the control points instead of changing the value directly in the Age Map. However the green time line in underneath the Alpha time line. So to make it visible, click the check mark to unselect the Alpha Color. The Alpha line goes away and we can now see the Green time line. Also uncheck the Red and Blue color time lines so only the Green is visible.
Next Click and hold on the far left (0) control point of the Green time line and drag it down a bit, about half way between 1 and 0, you should see the flame change colors as you drag it down. Grab the right most control point and drag it down to 0. You should now have a flame that is brighter red at the bottom and darker at the top.
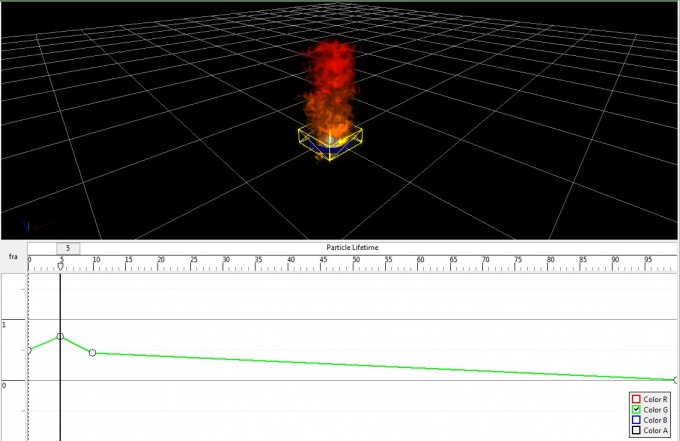
Now we are going to add 2 more control points to the Green time line. Move the Point Bar to 5 on the Particle Lifetime line, right click and select “Add Control Point”. Now move the Point Bar to 10 on the timeline and add a second control point. Grab the first control point we just added, the one at 5, and drag it up to about 0.7. This will create a bright flicker at the base of the fire.
Now we just need to fade out the top of the flame a bit so the bottom is more intense than the top. Uncheck the green timeline and check the Color A (Alpha). Color A is a transparency color and can be use to alter the intensity of the particle. Grab the Right most control point and drag it down to about 40% (0.4). You will see that the top is less visible than the bottom of the flame. Save your work.
Changing its size
Right now the flame is a single column that is the same size at the top as it is at the base, this is not very realistic so we will remedy that by changing the scale of the particle.
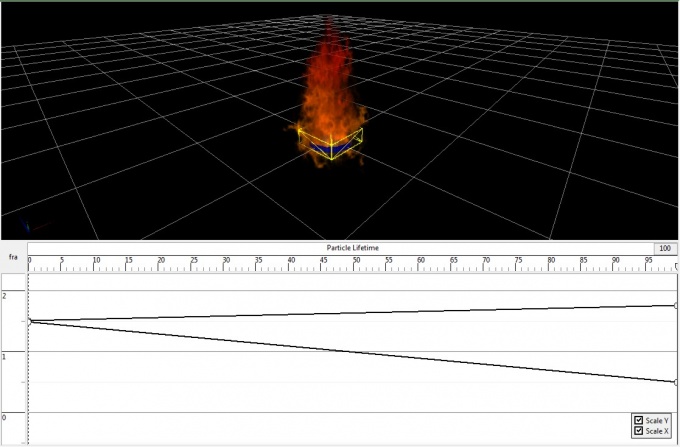
In the drop down menu at the top right, select “Scale”. Again you will see a time line labeled “Particle Lifetime” a Control point, and a box showing the “Scale Y” and “Scale X” time lines. As we did before, move the Point Bar to the far right at 100 and right click and select “Add Control Point”. Now uncheck the Scale X time line so only the Scale Y line is visible. Move the Left control point to about 1.5 and the right control point to about 1.75. Check the Scale X timeline to make it visible and move the left control point to about 1.5 and the right control point to 0.5. This will widen the base and stretch the top to a point much like a real fire.
Now the fun begins. Up until now we have been changing values over the lifetime of the particles. Now we will start changing values over the Impact, Duration, and Cessation time of the effect, but first save your work.
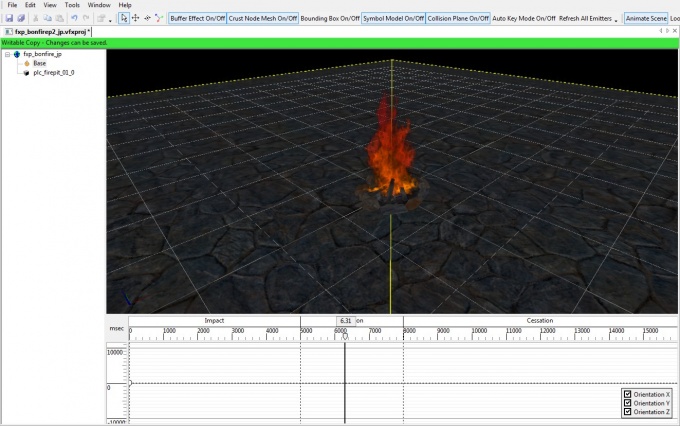
Select the “Emissions” Tab in the Object Properties. In the drop down menu, select “Birth Rate”. This time you will see a bit different looking time line. At the top you will see 3 sections, Impact which starts at 0 and ends at 5000, Duration starting at 5001 and ending at 8000, and the Cessation which starts at 8001 and ends at 1600. These times correlate to the 5 sec Impact, 3 second Duration, and the 8 second Cessation times specified in the VFX root.
TIP: You can Zoom Extents by double clicking inside the time graph, or zoom in/out by using the mouse scroll wheel.
When an effect is used in game, the Impact time plays, then the Duration time is looped for the length of the applied effect, then the Cessation time plays. For example, if the fire effect is applied to a wood pile for 3 min, the Impact time plays then the 2 second duration is looped for 3 min then the cessation time plays. With this in mind, we want the fire to build up to the a full blown fire, then taper off and go out.
In the Birth Rate time line, add 3 more control points, one at the Duration start, one at the duration end, and one at about 12000. Starting from the left move the left most control point to 0, move the second Control Point to 10, the third Control Point to 10 and the fourth to 0.
Notice that the flame stops burning like it was before. This is because now the total effect length is a factor. Slide the Point Bar back and forth on the time line, you can see what happens to the fire at any point in time. Now to view the animation of the effect, you must click the Play button in the upper right corner. The Point Bar will scroll across the time line and the results can be viewed in the effect window.
The fire should now start out slow and build up then taper off and go out at around 12 seconds. You can click on the Loop Animation if you want and the effect will continue to loop until paused by the Pause Animation button or by clicking in the time line.
Now select Life in the drop down menu. Right now each point in time the flame last 1 second. We want to change this so the flame when first starting out or ending doesn’t last that long. Keep the tip I gave above in mind, and make the Life time line look like the one in the picture. The Control Point times from left to right are 0, 1, 1.4, 1, 0 then save your work.
Let’s Dance:
Right now we have our fire looking pretty good, but there is one element still missing, the wavering and dancing of a real fire. On the Emission table item 12 and 13 are “Spawn Spread X (Deg)” and “Spawn Spread Y (Deg)”. These settings affect the spread of the particles in the X and Y directions, that is the particles can emit in varying directions in degrees from the emitter. Set both of these to 20 degrees.
Now our fire dances. Note that these settings could be set using the time line “Spawn Spread” as well, feel free to play with that if you wish.
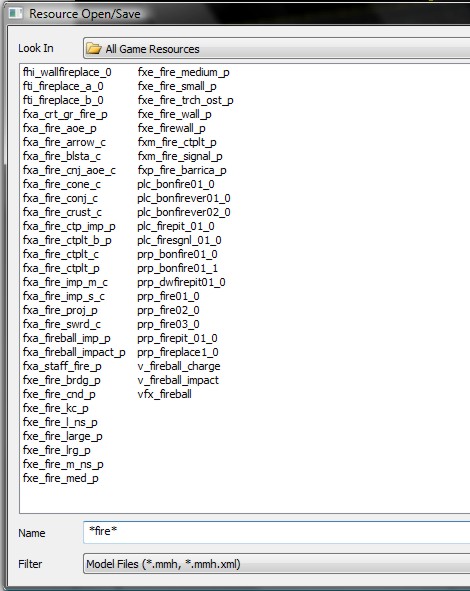
We can get a better Idea of what our effect will look like in game by adding a reference model. Right click on the Root and select “Insert > Insert Reference Model”. In the Resource window Name field we can filter the list to make it easier to find what we are looking for, so enter *fire* and press enter. Now your resource list will only show those items with the word fire in it.
Choose the resource “plc_firepit_01_1”. Turn Bounding box Off by clicking it at the top to un-highlight it. This gets rid of the yellow square around the objects. Turn the Collision Plane on by clicking on it to highlight it. This will simulate a stone floor at the walk mesh level.
Now play you animation. You can also select the Base object and click anywhere in the time line, for example if you place the Point Bar anyplace in the Duration time you can watch your fire burn at it’s full potential.
Challenge: Replace the plc_firepit_01_1 with the plc_bonfire01_1 reference model. Scale your fire up, and increase it’s life time to engulf the wood pile in flames. Don’t forget to save your work.
This concludes Part 2 of the tutorial. In Part 3 we will be adding smoke and lighting to the flame and make the flickering flame reflect off of surrounding objects.
VFX Tutorial Part 3
This tutorial assumes you have read Tutorial #1 and #2 and are now familiar with using the time lines to adjust values over time. You can down load the final effect from Tutorial #2 from the social site if you need it to continue with Tutorial #3.
Where there’s smoke:
Our fire is missing 2 more elements to be complete, smoke and lighting.
First we will add the smoke. Right click on the effect Root and select “Insert > Insert Emitter”. You will see a second emitter appear on top of the first one. Select the new emitter and in the Object Inspector properties, change its name to Smoke. For Material Library, select fx_smoke_vol. For Material Object select fx_smoke_vol_blend.
In the First tutorial we talked about the Flipbook Type: Contact Sheet. For this effect we will be using the Flipbook Type: Volume. This works similar to the Contact Sheet type except that the Flipbook Rows is the number of layers, usually 2 or 4. The Flipbook Columns should always be 1 and the Frame per second is a factor of the 2, i.e. Rows x Columns. Set these to 2, 1, and 2 respectively.
In the Age map, set the colors R, G, B to 0.5 and Color A to 0.7. Our smoke should now look more like smoke, but we have a ways to go yet. Smoke usually bellows upwards and spreads out as it rises. We can simulate this with a combination of the Scale and Scale Multiplier time lines. Select the smoke emitter and the Scale time line from the top right drop down menu. We want the smoke to grow in size both in the X and Y directions, but more so in the X direction.
Both X and Y should start at 1 and X should end around 5.5 and Y should end around 3.5 over the life of the particle. This will give us a funnel shape.
Now select the Scale Multiplier time line. We can use this line to make the smoke grow in proportion to the flame during it’s impact, duration, and cessation times.
Start out at a 0 multiplier and raise it to 1 at the start and during the duration time, then taper it back down to 0 during the Cessation time. Notice that at around 12000, the flame is gone and we are only left with smoke for the last 4 seconds of the effect.
Now we need to change a few of the Emissions. Set the Birth rate to 3, Life Expectancy to 2.5 and Life Expectancy +/- to 0.5. If you recall from previous tutorials the +/- will give us a variance on how long the particle last. As we did with the flame, we want the smoke to also waver from left to right and forward and back, set the Spawn Spread X (Deg) and Spawn Spread Y (Deg) to 10.
Changing Position:
By now you may have noticed that when you play the effect in full, the smoke stays at ground level. Smoke naturally rises from the top of the flame, not from the base. This is OK during the Impact and cessation phase as the fire is small and near the ground level. However, we need the smoke to rise to the top of the flame during the Duration phase. To do this we will use the position time line to make the smoke rise, and lower as the flame grows.
With the smoke emitter selected, select the Position Time Line. Unselect the X and Y position time lines so only the Z line is visible. Add a control point at the start and end of the Duration time. Also add a control point at around 12000 and one at the end of the effect time.
Raise the control points at the start and end of the duration to about 1.2, so it looks like the pic below.
Now when you play the effect, the smoke should rise and lower with the flame. Feel free to play with any of these settings to get the look you like best.
Fade it out:
If you zoom out and look at the Animation as a whole you will notice that the smoke just suddenly disappears at the top, looks a bit odd. Instead we will fade it out so this isn’t seen.
Select the Smoke emitter and then select the Color time line. Uncheck all the colors except the Alpha color. Add 2 or 3 control points towards the end of the time line and tapper the alpha down to 0 at the end of the particle life time. This makes the smoke fade out naturally. Save your work.
Light My Fire:
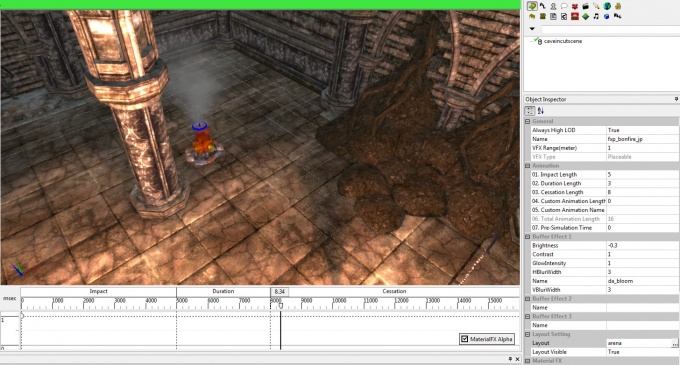
Before we continue, let’s put our fire into a game scene. Select the VFX Root and in the Object Inspector, under “Layout Settings”. You can select a area and see what your effect will look like in game. In Layout, select the area resource. Your effect should be near the upper right corner.
Play the VFX a few times, notice there is no light given off by the fire.
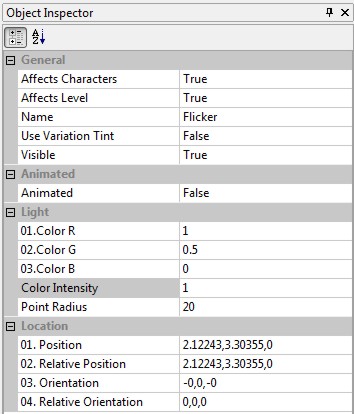
Right click the VFX root and select Insert > Insert Light. A new light object will be inserted on top of the fire emitter. It’s right where we need it to be, by default.
Light Properties: Affects Characters: Set this to true. This setting specifies if the light should reflect off nearby creatures and characters. Affects Level: same as above but it applies to the surrounding terrain. Name: Name your light, I called mine “Flicker”
First we need to give the light some color, a good yellowish – red should do. Set Color G to 0.5 and Color B 0. To make the fire flicker, we will change the intensity of the color to coincide with the flame.
Select the Flame object and then select the “Color Intensity” time line from the drop down list. Add several control points and adjust the intensity up and down so it climaxes during the duration, similar to the image shown.
Be sure to drop the intensity to 0 at around 12000 as this is where the flame goes out.
TIP: You can manually slide the time bar left and right on the time line to get a visual check of the intensity control points.
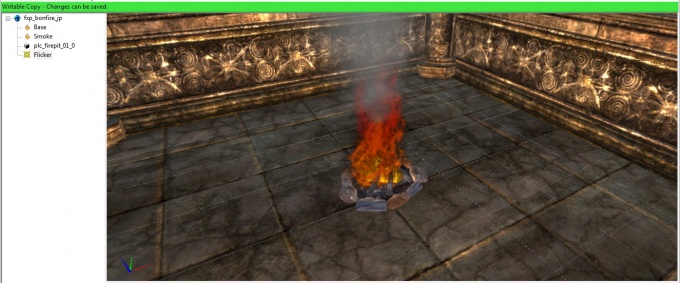
Now we have a nice bon fire complete with smoke and lighting.
Challenge: Using the Material Library “fx_distortionmatlib” add a third emitter and give your fire distortion.
This concludes the basic VFX Tutorials, Thanks for reading. Author: Jassper
| Language: | English • русский |
|---|
