Step by Step: Installing the Toolset
This article contains links to the BioWare Social Network (BSN), which is now closed.
These links should be replaced with working links where possible, and tutorials edited to remove reliance on BSN.
Contents
Step by Step: Installing the Toolset
The Step by Step series of articles are meant to be a 100% walk through of an activity, complete with pertinent details and screenshots of every step of the process.
Check Prerequisites
Do not attempt to install the toolkit without ensuring you have at least Windows XP with Service Pack 3, Windows Vista, or Windows 7. The SP3 requirement can be overlooked if you're technically savvy but for the smoothest experience I'd recommend installing the whole shebang.
Want to know why not? Check the Forums.
Install Python 2.5
Python 2.5 is required for the light mapping inside the toolkit to function, and it is preferred that it be installed first. ActiveState's ActivePython is the best choice, and is available for free. The latest version as of November 15, 2009 (2009/11/15) is 2.5.4.4 and it can be found here.
Caveats:
- There are some who have had issues with the 64 bit version; I personally haven't. You may want to pick up the 32 bit version just in case.
- Install to the default directory to avoid any issues with the toolkit. C:\Python25 is the normal default.
Toolkit Installation
These instructions and screenshots are for v1.0.982.0 of the toolkit. They may or may not apply to later versions.
The toolkit is available from Bioware's Community Site. It's 472Mb.
Double click the executable to install the toolkit. If you have an antivirus scanner installed on your computer don't be surprised if it doesn't pop up right away; the antivirus scanner has to process all 472MB of the executable before it will be allowed to run.
If you have Windows Vista or Windows 7 you'll be prompted by UAC to allow the installer to run. Choose yes if you obtained the toolset from the Bioware site.
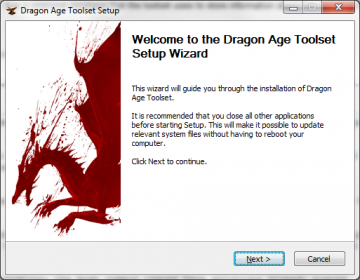
Welcome Screen
Once the installer has started you'll be greeted with the welcome screen.Click the Next button.
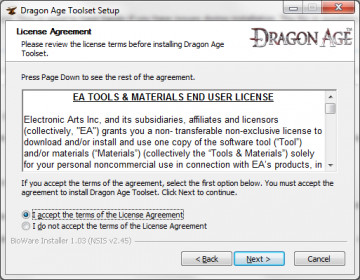
End User License Agreement
You'll be greeted with the end user license agreement. You're creating content for someone's software using this application; I highly recommend you actually read the license.
Accept the license agreement by selecting I accept the terms of the License Agreement and click Next.
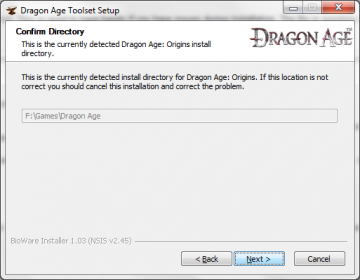
Dragon Age Installation Directory Confirmation
The third screen is asking you to confirm the installation directory of Dragon Age. The toolset requires Dragon Age to be installed; if the directory shown here isn't correct I would recommend reinstalling the game, then restarting the installation of the toolkit.
If the location is correct click Next to continue.
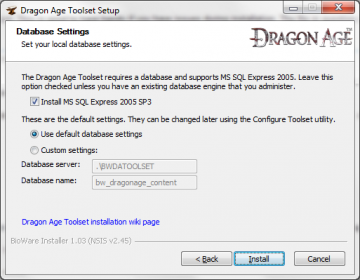
SQL Server 2005 Express Installation
SQL Server Express is a free version of SQL Server offered by Microsoft. It is a relational database that the toolset uses to store information about the currently installed modules and campaigns. Most of the problems around the installation of the toolkit revolve around the installation of SQL Server Express 2005.
If you have no idea what any of these things mean it is recommended that you leave the default settings as they are.
If you have an existing SQL Server 2005 installation you wish to use uncheck Install MS SQL Express 2005 SP3. You'll then need to check Custom settings: and enter in the information for the database you already have.
The installer will attempt to connect to the SQL Server you specify and it will run a series of scripts against the database you provided. You should ensure that SQL Server is running on the appropriate machine and that you have no data you wish to save in the database you selected to install to.
Once the configuration is to your liking click Install to continue.
Examples:
- My SQL Server 2005 machine is named VORTEX, and it does not have any instances installed on it. The database server for it would simply be VORTEX. The database name would remain bw_dragonage_content unless you have a reason to change it.
- My workstation also has a copy of SQL Server 2008 on it with no instances. I could reference this installation one of two ways. The first would be as BRIAN-PC; the other would be by using the period by itself.
- It should be noted that the . in the database server refers to the local machine; this should be replaced by the name of the machine on which your installation of SQL Server resides. The \BWDATOOLSET refers to the database instance on that machine.
Problems?
- Visit the official forums and search there before posting; the most common issues have solutions already posted.
- Check the Installation troubleshooting page.
- A log file will be created in your Documents folder during the installation. This is good to have handy if you have issues during installation. The file in question is named "Install Dragon Age Toolset.txt".
Toolkit Installation
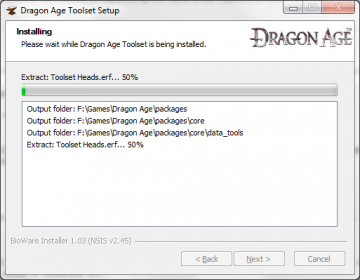
The installation will take some time. Grab a drink, use the restroom, put together a playlist for your listening pleasure.
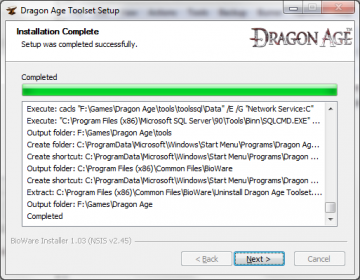
Toolkit Installation Finished Verification
The last item in the window above should be Completed. If there's anything else scroll up in the window until you find the error and copy and paste that error somewhere for safe keeping. Seek help in the forums or on the Internet, and restart the installation process.
Click Next to continue.
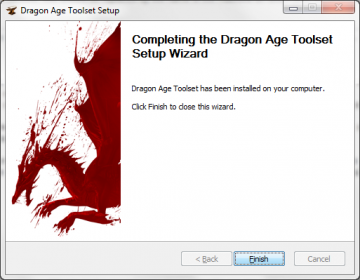
Toolkit Installation Finished
You're done. Assuming no unexpected errors appeared during the installation process you should be ready to start editing.
Click Finish to complete the installation.
