Level tutorial
Lighting
- Basic lighting (or advanced lighting)
- Render Lighting
- Save the Lightmap
- Test the Level
Basic Lighting
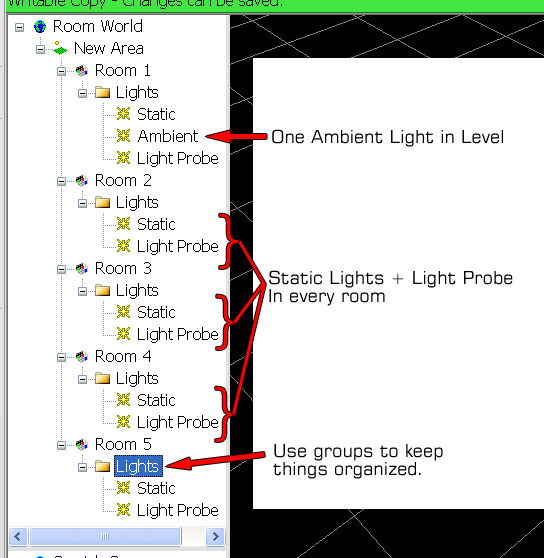
To light an area with basic lighting, do the following:
In the first room:
- Static Light (Change Light Radius to 600)
- Ambient Light
- Light Probe
In all other rooms:
- Static Light (Light Radius = 600)
- Light Probe
Thats it! Now continue on to the "Render Lighting" step.
Render Lighting
Just click the Render lightmaps button, and then wait for the light maps to render. When they are done rendering RE-OPEN the level you were working on, and click the visualization button on. Save the Lightmap (back to top)
With visualization on. Click the
- Render lightprobes button - Wait for them to process
- Generate pathfinding
- From File Menu choose "Save As" and click save.
All you are doing is saving over top of the original map. This is needed to create or update the ERF lighting map that is created with your level.
Lightmaps / Lightprobes
A light map is pre-rendered lighting information which:
- Is only affected by baked and static lights.
- Makes things pretty.
Making a Basic Room
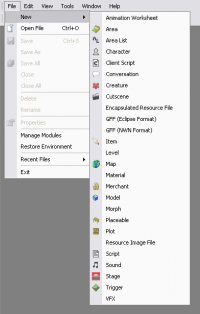
Create a new level
Select "Room Level" and click next and finish.
Setting the Grid
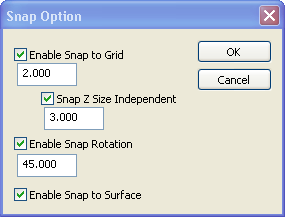
Set the grid by clicking on the magnet button.
- Set the grid size to 4
- Ensure the "Snap to surface" box is checked.
NOTE: You should always try to use the highest grid setting possible.
New Room
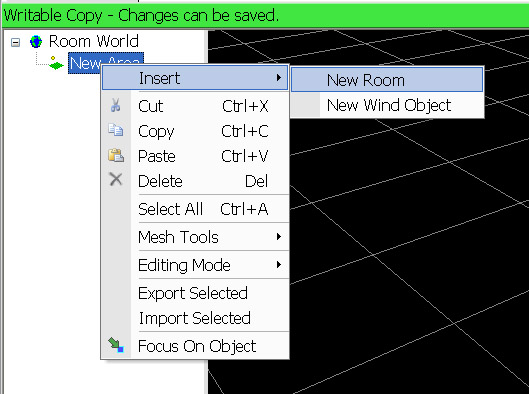
Create a new room by right clicking on "New area" under "Room World". Then left click on the new room to select it.
Each room contains a list of models or objects including some lights, but it also has properties.
Spawning Objects
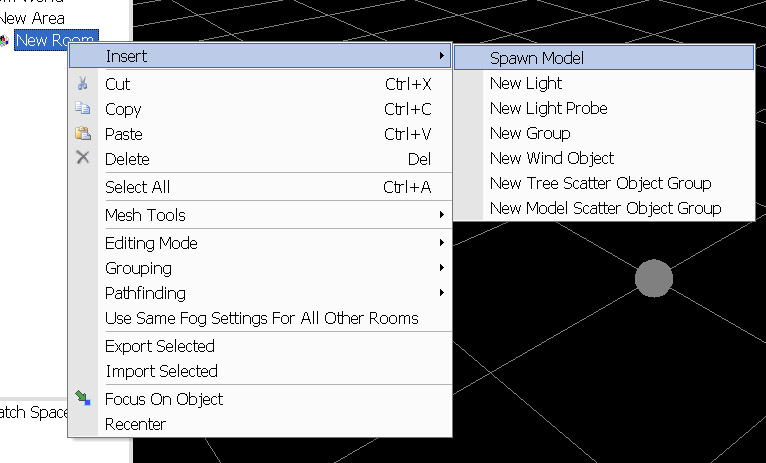
Right click on the "New Room" and select "Insert" then "Spawn Model"
You should see a window like this:
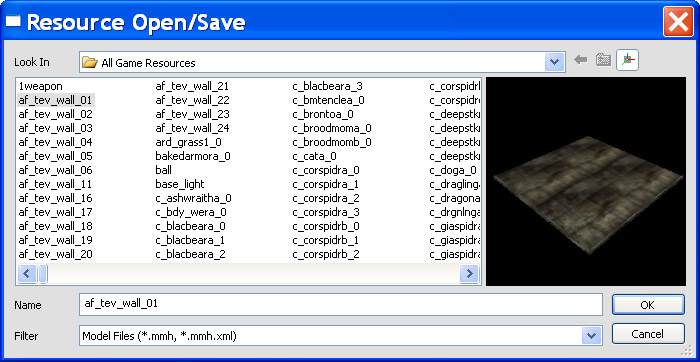
Click on any item in the window to select it then click on the small squareish icon in the top right hand corner of the window. It should look something like this:
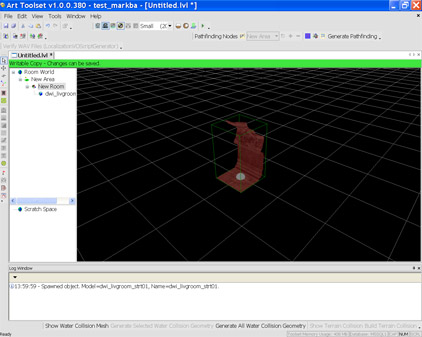
Go to the files labeled "dwi_" and select "dwi_livgroom_strt01". Press "Ok" and you should have this:
Now press the 3D axis button. It should look like this: ![]() . Your piece will have a 3D manipulator on it and look like this:
. Your piece will have a 3D manipulator on it and look like this:
NOTE ABOUT TILESETS: All tilesets will fit together differently. Be sure to use the same tileset for a single map.
Interiors
Exteriors and Interiors (Room Levels) are different beasts. We'll start with Interiors. A lot of the things you'll do in interiors are equally applicable to Exteriors, too.
First thing you need to do is enter a "Layout Name" in the Object Inspector. This is the name of the file you’ll be referencing in the designer toolset.
To do anything you need to create a room:
- Right-click on “New Area” then Insert -> New Room.
Rooms are solely in the art tool for visibility reasons. If something isn’t visible, the models inside it don’t have to be in memory. Sometimes a room will be comprised of several art “rooms.” The goal should always be to break up visibility so only necessary art resources are in memory at any given time.
Room names are only important internally. They are never used in the design toolset.
Now that you have a room, right-click on it then select "Insert". Check out all the things you can add to a room. The following sections cover some of the options.
Models
When inserting a Spawn Model, currently you just see a file list with no preview. Hopefully a model preview system makes its way into the toolset soon. So select a few different files and see what they are.
- For work flow, it’s best to grab areas similar to the ones you are and copy and paste rooms or groups.
- Another work flow tip, it can be good to put any piece you could possibly need all together in a group in some sort of palette room. Then copy those and paste them where you need.
If you copy and paste an object, the new object is placed immediately on top of the other one. So visually you can’t tell if the operation was successful.
You can also place things with the "Model Placement" button. In the Object Inspector click on Name and you can then add a model name. Then when you left-click that object will appear in the world. If create something with a right-click insert that model will appear at position 0,0,0 right now. Hopefully that’ll change.
Groups
"Model" Groups can be copied, pasted, imported, exported, and dragged between rooms/areas.
To create a Model Group:
- Right click on the desired room/area and select Insert -> New Group.
- Now you can insert new models into the group or drag existing models into the group.
- You can also create a group from existing models by selecting the desired models and then right clicking on them and selecting Grouping -> Create Group from Selection.
Groups can exist inside other groups.
Connecting Rooms
To "connect" rooms, click on a room and add connected and visible rooms.
- Connected rooms share pathfinding information (you can walk to them.)
- Visible rooms are rendered from the current room (any rooms you can actually see from inside this room.)
Populating Rooms
If you have a room selected, now you can place a variety of things. Right-click on your newly created room and look at what you can “Insert”.
Best Practices
These practices are in place to ensure a successful export every time of a level that is playable and functional (also every time). Please add to this if you find more practice that avoid issues.
- Try to make sure each art “room” is visible to as few other rooms as possible. Having multiple rooms loaded in memory will be a BIG performance hit. Jags in halls are your friend.
- Put a dynamic, ambient light in each and every room until a more global ambient light solution is in place. Which rooms are visible to which will change, so walls of blackness may greet the player.
- Run through every room in your level in Preview Mode before posting it to the network.
- When beginning a level, it is best to start at 0,0,0 so that all your floor and wall tiles are multiples of 8 and it is easy to quickly glance at their position to see they are correct.
- When placing wall and floor tiles, set your snap size to at least 2. 4 and 8 are also recommended for quick area creation.
- Always have your interior map have 0x, 0y on a playable room. Either the beginning of the level or the center.
- Village tiles are much smaller than other tiles. Half the size. So are the Ferelden Castle Interior pieces.
Tips and Tricks
The following list helps make level building go much quicker:
- For building interiors “Change Snap Options” is invaluable. The default values are .5 and 45 degrees.
- Selection Lock allows you to make an object (or group of objects) non-selectable when you click on them in the world view.
- This is most often used to make the interior tiles non-selectable as you are placing and moving around props.
Troubleshooting
- I load an interior area in the engine and everything is black. Or, alternatively, I'm running through an area and suddenly I enter a black patch and am now stuck.
- Rooms have to have a light, or be attached to a room that has a light, for anything to be visible. Artists and tech designers can fix this by attaching a Dynamic Ambient light to that room.
- An alternate problem that could cause this other than lighting is improper physics for floor pieces. This can cause the player to "fall through" the floor and have it seem like everything went black. Typically, if this happens, you can notice it by the fact that if you walk backwards the room does not show up again. If it were lighting that was causing this, you could walk back and see the room again the way it was before. The solution to this is to find the model which is causing you to fall in the art toolset and fix it.
- My placeables in an interior area are not showing up in the engine. I see them in the toolset, but not in the game.
- A tile needs to have physics attached to it, otherwise any placeable put on top of it will not appear in the engine. The model for the tile will need to be fixed.
Exteriors
Exterior levels can turn themselves into rather large projects and it will be rare that they will be tackled for light content. Regardless, they are important to know and understand.
Creating Terrain Worlds
The first thing you will notice after creating a new exterior level is that there is an "Advanced" button when you are picking the size of the area. These greatly effects how your textures look in the area. We have been advised to use the following settings for ALL exterior levels until further notice:
- Cells Per Sector: 16
- Base Cell Resolution: 8
- Blend Texel Size: 320
- Cell Length: 128
- Cell Width: 128
- Tesselation Level: 4
Modifying Terrain Worlds
There are many unique interface features available to exterior areas, some of which may need some explaining:
- Smooth - Smooths all terrain within the brush radius. This will turn your monstrous mountains into puny hills.
- Tesselate - Splits up the polygons of the area into smaller ones, allowing for more delicate modifications. There is a limit of how many times this can be applied, but the smallest size should be enough for any endeavor. Right clicking undoes the Teselation.
- Texture Smooth - Smooths two or more materials together. You will use this if you want them to look nice.
- Relax Map - If the terrain texture has been stretched by distortion of the terrain mesh, this tool restores it to its original scale.
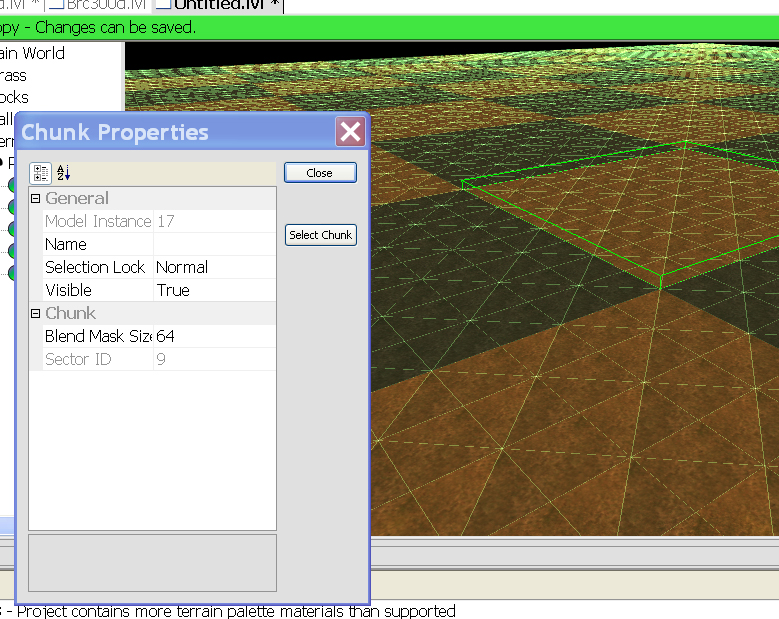
- Terrain Chunk Management - Used for naming and setting Blend Mask Size for Terrain Chunks.
- Show/Hide Terrain Chunk Boundries - Shows Terrain Chunk boundries that make up the Terrain World.
Aside from morphing terrain, like interiors, you can add spawn models and lighting anywhere you wish. At the moment, lighting does not effect terrain in the toolset, but it does effect all the spawn models you have placed. Right clicking on "Terrain World" will allow you to insert any object.
Materials
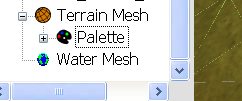
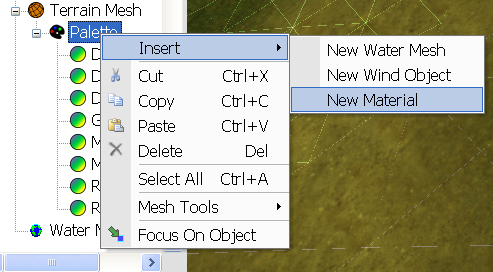
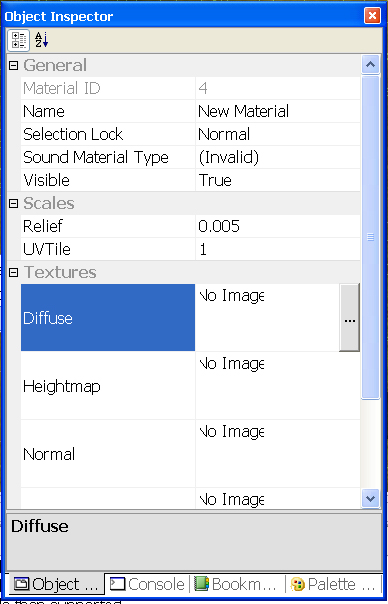
In order to add a new material, right click on the Palette Object and select Insert -> New Material. Following that, give the material a name and set its Scale and Textures.
Scale:
- Relief: How many times the texture is mapped onto the material (???)
- UVTile: Scale of the texture. Higher numbers shrink the texture down (for instance smaller cobblestones). Default value is 1.
Textures:
- Diffuse: Defines the color and intensity of light reflected back by the material.
- Heightmap: Defines the height of individual pixels on the material.
- Normal: Defines the direction the material appears to be facing.
- Specular: Defines “shiny-ness”. The lighter it is, the shinier the material will be.
Skyboxes
Clicking on the "Exportable Area Property Box"
Find "Skydome Model" Under the Atmosphere Settings. Select sb_newlayout from the list. This is a dynamic shell, you can change it's characteristics. Don't use any of the other shells.
Creating an Exportable Area
In order to export an exterior, you must first designate what part of your Terrain world it takes up:
- Create an exportable area (
 button in the toolbar)
- When you are ready to export a part of your Terrain World, press this button. It will bring up a window allowing you to set many options that will effect the export. For now, you are only concerned with Defining the Area. (TODO: Other options are not covered.)
- After defining an area, close the window and select the Exportable Area you just created from the list. With this selected, you may now access the standard export and preview buttons on the menu.
Texturing
Loading up the Palette
When you first create an exterior level you will have to add textures to the palette.
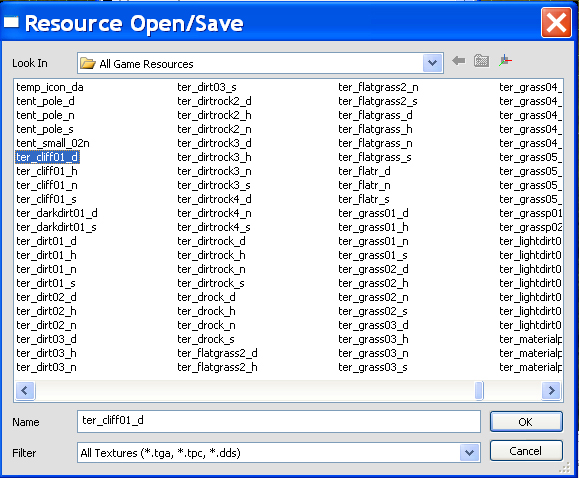
Go to the object window and click on the diffuse section. Click on the little dots to open the window.
All textures for terrain you will need start with the "ter_" prefix. Or you can find your own textures by name. So if you wanted to add a rock texture from DAO look for ter_rock_d
Note that all textures, will have 4 suffixes. d, n, h, and s. These stand for diffuse, normal, height, and specular respectively. So when you finish selecting the diffuse you like, go back and choose the corresponding textures for normal, height and specular to complete the texture.
Limit of 8 Textures
Texture Settings
UV Setting - UVTile is 1 by default but you need to change it to 8 if you use your own textures - this way texture will loooks like in the file itself.
Relief Settings
Sound material Type
Typical Textures to use
Texture Tools
Texture Paint
Brush Settings
Grid Opacity
Important Things you should know
Layering Textures
When you paint a slightly transparent texture on top of another you will see the textures blend together. You can only blend 3 textures on top of each other in this way. If you add a 4th the first texture will disappear on the area you painted the newest texture. And it will look odd.
Instead of making a big mix of textures, set base textures for an area and use those to paint. You should only worry about blending at the seems of the textures for the most part. Chunk Boundaries
Why don't my textures blend well?
If you are starting a new map your textures will likely blend together in a very pixelated fashion. If this is the case, you have to play with "Chunk Size".
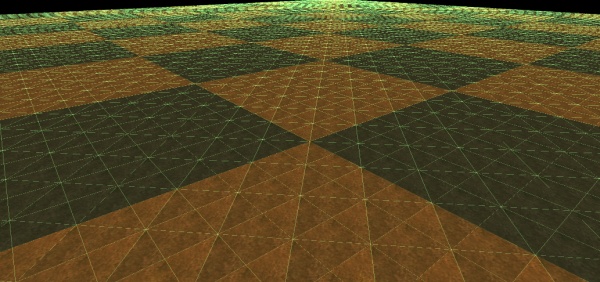
Look for the checkerboard "View/Hide Terrain Chunk Boundaries" button. Turn it on and your terrain will look like an orange checkerboard. Each of these squares is a "chunk". Now look for the other checkerboard button. (Chunk Management Tool)
With this open;
- Click on the "Select Chunk" button
- Click on the square you want to modify
- Change the "Blend Mask Size" to either 128(low quality), 256(fair quality) or 512(High quality)
Limitation of 3 Textures on top of each other
