Creating recolors of existing items tutorial
This tutorial describes how to create a custom Item by recoloring an existing item. It is assumed that the reader is familiar with the Toolset. These instructions are based on a forum post by Dylbot.
Contents
- 1 Getting Started
- 2 Create a new material
- 3 Add a new tint library to Root
- 4 Add a new tint object to that library
- 5 Enable the red, green and blue channels
- 6 Open the tint file for the object you are recoloring
- 7 Change the colors as desired
- 8 Name and save the tint file
- 9 Add the new tint to your tint_override m2da
- 10 Related Links
Getting Started
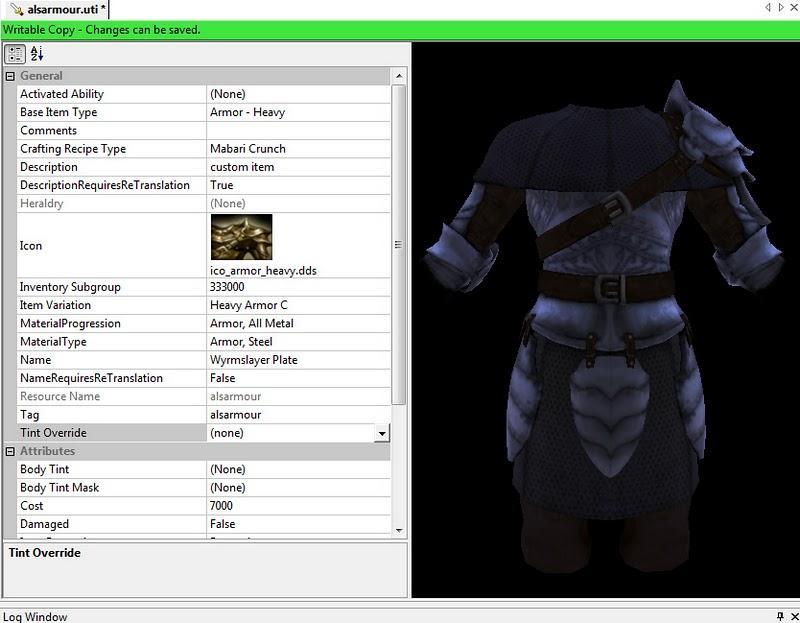
Open the item you want to recolor. For the purposes of this tutorial, we're going to go for heavy chainmail.
If creating a new item, to select heavy chainmail, in the toolset click File>New>Item and change the "Base Item Type" to "Armor - Heavy" and the "Item Variation" should be set to "Heavy Armor C". To modify all heavy chainmail worn by every character, in the toolset, click either "Item" (sword icon) or "All" (icon with the word: All) in the Resource palette then in the tree of folders below expand "_Global" > "Armour, Chest" > "Heavy", then right click the item "gen_im_arm_cht_hvy_hch.uti (Heavy Chainmail)" and choose "Check Out".
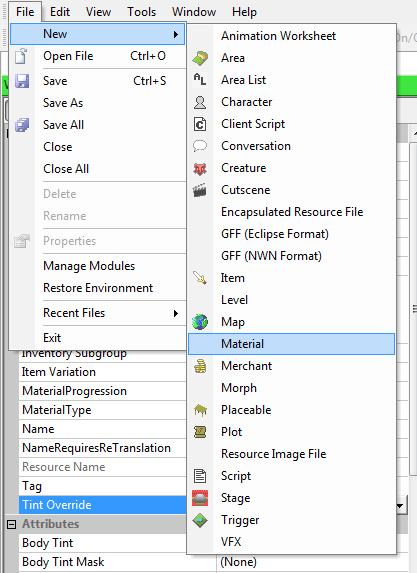
Create a new material
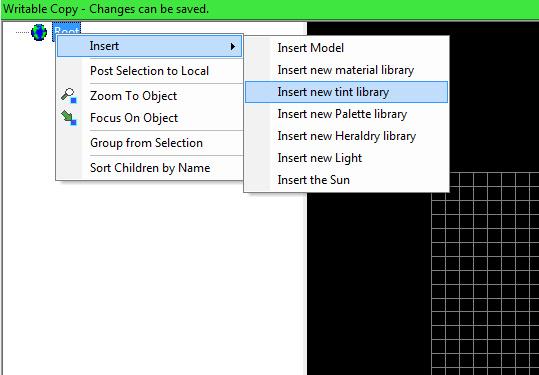
Add a new tint library to Root
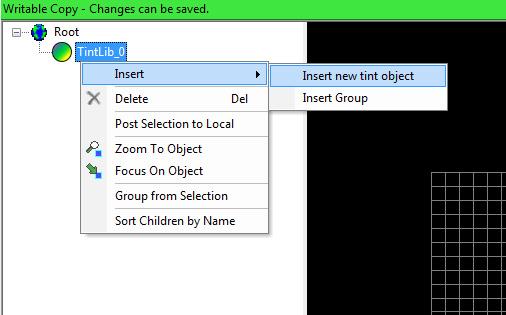
Add a new tint object to that library
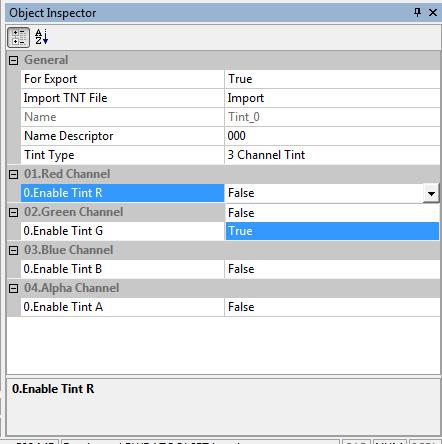
Enable the red, green and blue channels
Open the tint file for the object you are recoloring
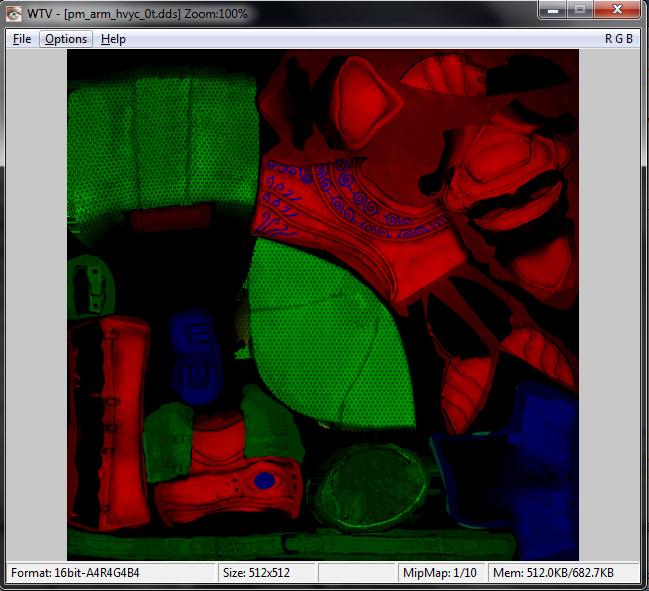
You'll need to know what you're changing when you color the channels. You can do this with WTV (Windows Texture Viewer). WTV is available on the DDS page, provided for free by Nvidia.
Using the Toolset, open up texturepack.erf in (Dragon Age directory)/packages/core/textures/high/, and scroll down to the texture you need (in this case, it's pm_arm_hvyc_0t.dds, signifying male, armor, heavy, type c, tint map). Right-click and open resource. At this point, you may want to hide the alpha channel in WTV, or all you're going to see is a pink square.
What you're seeing is the armor texture, divided into three channels; red, blue, and green. As you may have guessed, each of the channels corresponds to the equivalent colored area on the tint map.
Change the colors as desired
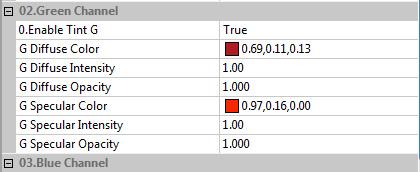
If you do this:
All of the green areas on the tint map (the chainmail and the belts) will become red on the model when you apply the tint. A little tip: the Diffuse color changes the base color, and the Specular color changes the reflection color. Change colors as you please.
Name and save the tint file
Once you're happy, give your material a name (I'd suggest sticking to the naming convention of the game, so something like arm_xyz, it'll add the T3 itself) save the matproj, and right click on Root - Post Selection to Local.
Add the new tint to your tint_override m2da
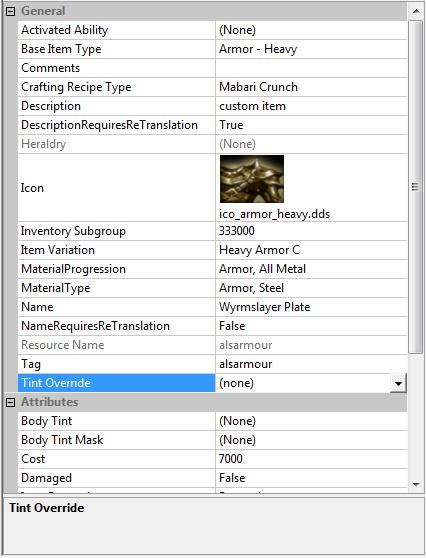
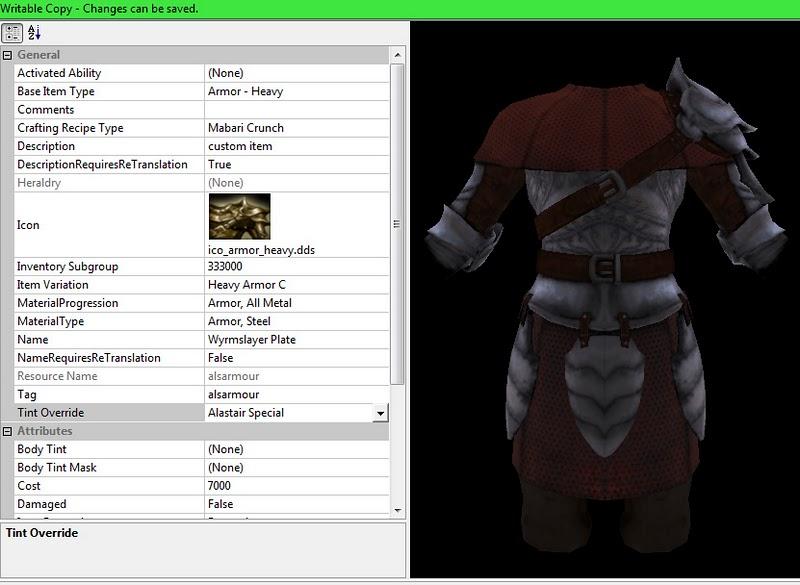
Now, the next bit is a bit more complicated. In the item settings, you may notice an option called Tint Override.
What we're going to do now is tell the game that our new tint is one of these overrides. This comes with the added bonus that the armor can be set as any material and still have the custom color. You'll need a spreadsheet program, so if you don't have MS Office, go pick up OpenOffice (if you don't have it already, naturally). Done? Right. Navigate to (Dragon Age directory)/tools/Source/2DA, and copy Tints.xls to your documents area, or wherever. Open up the copy, and choose the tint_override sheet. Add your new tint in at the next available blank line (put whatever you want as the label, something like "My Custom Tint 1" or something that makes it obvious what it is, and the file name in the tintfile box, which, in the case of our example, would be t3_arm_xyz. Star out the last column like the other tints). Save the worksheet and close it. Now, you're going to need to export that to the 2DA format. There's a handy tutorial over at the DA Builder wiki - Compiling 2DAs - which looks a bit scary at first, but is nothing to be worried about. If you don't know how to create a batch file, all you do is create a new text document, and change the extension from .txt to .bat. Once you've exported, chuck the tint_override.gda file into the game's override folder, as described in the 2da tutorial.
Now, close the toolset and open it again. Check out your piece of armor, and check the tint overrides. Lo and behold, your new tint is there. Apply that sucker and admire your handiwork.
Save, check in, and export the armor. If you've got gloves and boots (and you should have, we're going for a matching set here), check them out and apply the tint too. You can even apply it to weapons and shields if you want. Once everything is checked out and exported, load up your game and take a look at your shiny new equipment (if you've set up your loading script, or already have the equipment. If not, check the custom item tutorial, it'll tell you what you need to know).
Alastair wearing the new armor.
