Adding a Location to the Single Player Campaign Tutorial
This tutorial describes how to add a new visitable location to the single player world map. It is assumed that the reader is familiar with Creating a module, and the Area tutorial.
Contents
Create your Module
Create a new module: File -> Manage Modules... -> New...
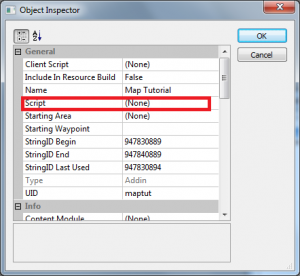
Change the default script field to (None), as in Fig. 1. This field must be changed because running module_core has been known to cause unusual behavior in the game.
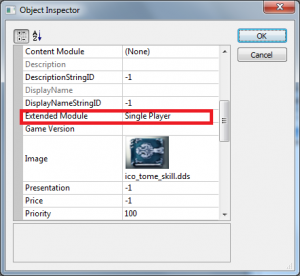
Additionally, the module should extend the single player campaign. To do this, set the “Extended Module” field to Single Player, and be sure that "Content Module" remains set to None. (Fig. 2).
Create an Area
Create a new area: File->New->Area. Give the area a meaningful tag. The tag will be how the area is referred to in the toolset. The area in this tutorial is tagged “maptutarea”. Select the appropriate layout for your area in the object inspector. (If you have created a level and exported it, this is where you would select your exported level). For the tutorial, I have used Flemeth's hut---“ost101d”. For more information about creating new areas, see the Area Tutorial.
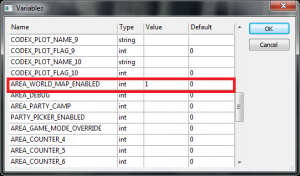
Most of the default properties of this area are fine for our purposes. The one field that will need to be changed is “Variables.” Select the ellipses by the Variables field to bring up the list of variables for the area, and scroll down to “AREA_WORLD_MAP_ENABLED”. This variable determines whether or not it is possible to travel to the world map from this area. Since we're keeping things very basic, we won't have any doors leading to area transitions---instead, we'll just make fast travel possible from anywhere in this area. To do this, change AREA_WORLD_MAP_ENABLED's value to 1 (Fig. 3)
In the area itself, place a waypoint and give it a meaningful tag. This tag will be the location where the player is spawned when he or she travels to that location. I've given my waypoint the tag “start”.
Make a Map
Create a new map: File->New->Map. Most of the default properties of the map can be left alone. The one field to change is the Map field, under Map Selection. Select “Wide Open World” from the list of selectable maps. This provides the background image for the map.
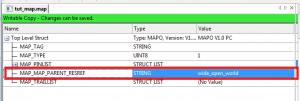
You can skip the last step (Modify the Map File) if you change the Parent Map attribute. Just select "wide_open_world" and the job is done. This way you are saying to the game that the new locations included in this map will be added to the Single Campaign's main map.
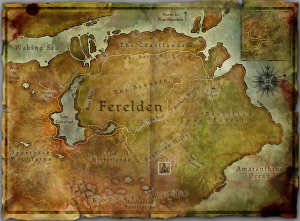
Next, place a pin on the map wherever you wish your new location to be located. To place a pin, right-click on the map and select “insert pin”. My pin was placed near the Korcari Wilds (Fig. 4).
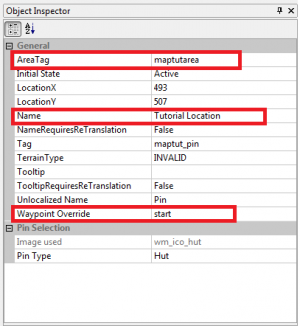
In the object inspector, name the pin the name you want displayed in the world map. Set the Area Tag field to the name of the area created in Section 2. Then, for the waypoint override field, put the tag of the starting waypoint in the area being added. The waypoint in this tutorial was tagged “start”. (See Fig. 5]). You also want to change the "Initial State" field from "Invalid" to "Active". If you don't do this your area will show up in the world map, but it will be gray and you will not be able to enter it.
Note: The following needs some images
Next, place a trail on the map from an existing pin (doesn't have to be exact, but closer is better) to your new pin. Try to use a logical jumping off place. To find pins to start with load the wide_open_world.map file from the main campaign (Extracting And Viewing The Main Campaign Map) or check out this list (Single Player Campaign Map Pin List). To create the trail, right click on the map and click "insert trail" and left click for each point in the trail. You want enough points that the trail looks good, it takes a little experimentation to get it just right. Double left click on the map when you're finished creating the trail. In the object inspector, set the properties for your new trail. Set the name to anything you want and set the start pin tag to the tag from the wide_open_world map and the end pin tag to your pin.
Export the Module
For each resource created, select “export without dependent resources.” The resources to export are:
• The custom area (named “maptutarea” in this tutorial)
• The custom map (named “tut_map” in this tutorial)
• Any other custom items or areas included
Then, update the module and manifest XMLs (Tools->Export->Generate Module XML and Tools->Export->Generate Manifest XML).
Modify the Map File
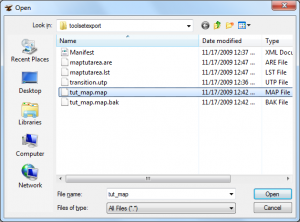
The final step in adding a new location to the single player map is modifying the exported map file. To do this, open the map file in the toolset: File->Open File. It can be found in:
Documents\BioWare\Dragon Age\AddIns\(your module name)\module\override\toolsetexport\
Once this file is opened, its parent map must be set to the World Map. To do this, change the MAP_MAP_PARENT_RESREF field to “wide_open_world”. (Fig. 7)
Once this final modification is made, the location should be visitable from the single player campaign, just like any official DLC.
