Difference between revisions of "User:Talonius/Sandbox"
m (Minor corrections.) |
m |
||
| Line 161: | Line 161: | ||
<br style="clear: both" /> | <br style="clear: both" /> | ||
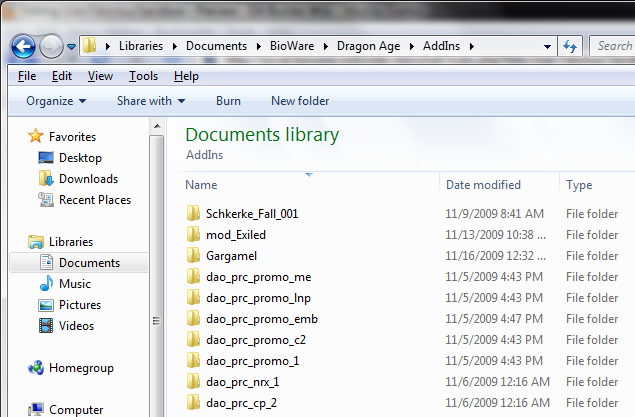
| − | [[File:Talonius_Toolkit_Module_Create_006.png|left|middle|frame|Shows where | + | [[File:Talonius_Toolkit_Module_Create_006.png|left|middle|frame|Shows where our files live when they exported on Windows 7.]] |
Here we can see that the directory in which our addin lives is named Gargamel, which corresponds to the '''UID''' value entered in the module properties. We can also see the various DLC items that have been installed from the game. | Here we can see that the directory in which our addin lives is named Gargamel, which corresponds to the '''UID''' value entered in the module properties. We can also see the various DLC items that have been installed from the game. | ||
'''Note:''' On a Windows XP computer you'll find this directory in your '''My Documents''' folder. | '''Note:''' On a Windows XP computer you'll find this directory in your '''My Documents''' folder. | ||
Revision as of 21:08, 16 November 2009
Contents
Creating a Small Adventure Step by Step
This page is intended to provide step by step instructions for each portion of the module creation process, including by linkage the various other pieces of the Wiki but allowing someone to follow it and understand how all the pieces go together.
Check Prerequisites
Do not attempt to install the toolkit without ensuring you have at least Windows XP with Service Pack 3, Windows Vista, or Windows 7. The SP3 requirement can be overlooked if you're technically savvy but for the smoothest experience I'd recommend installing the whole shebang.
Want to know why not? Check the Forums.
Install Python 2.5
Python 2.5 is required for the light mapping inside the toolkit to function, and it is preferred that it be installed first. ActiveState's ActivePython is the best choice, and is available for free. The latest version as of November 15, 2009 (2009/11/15) is 2.5.4.4 and it can be found here.
Caveats:
- There are some who have had issues with the 64 bit version; I personally haven't. You may want to pick up the 32 bit version just in case.
- Install to the default directory to avoid any issues with the toolkit. C:\Python25 is the normal default.
Toolkit Installation
These instructions and screenshots are for v1.0.982.0 of the toolkit. They may or may not apply to later versions.
The toolkit is available from Bioware's Community Site. It's 472Mb.
Double click the executable to install the toolkit. If you have an antivirus scanner installed on your computer don't be surprised if it doesn't pop up right away; the antivirus scanner has to process all 472MB of the executable before it will be allowed to run.
If you have Windows Vista or Windows 7 you'll be prompted by UAC to allow the installer to run. Choose yes if you obtained the toolset from the Bioware site.
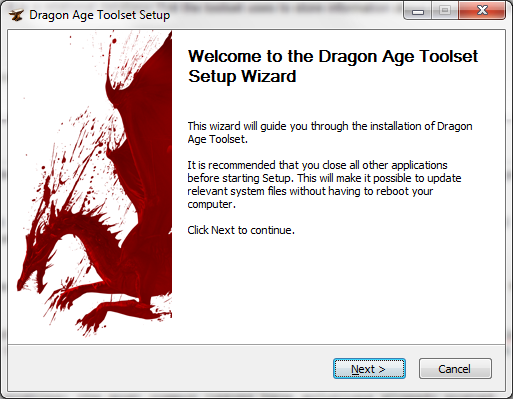
Welcome Screen
Click the Next button.
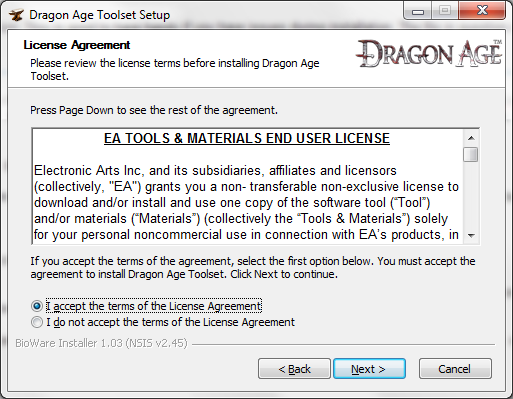
End User License Agreement
You'll be greeted with the end user license agreement. You're creating content for someone's software using this application; I highly recommend you actually read the license.
Accept the license agreement by selecting I accept the terms of the License Agreement and click Next.
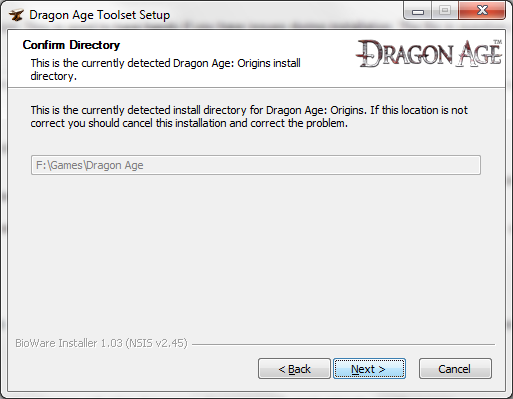
Dragon Age Installation Directory Confirmation
The third screen is asking you to confirm the installation directory of Dragon Age. The toolset requires Dragon Age to be installed; if the directory shown here isn't correct I would recommend reinstalling the game, then restarting the installation of the toolkit.
If the location is correct click Next to continue.
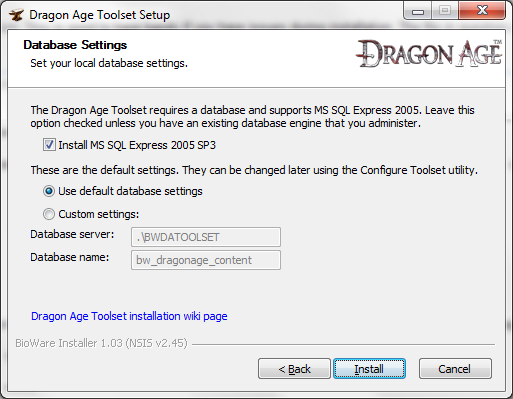
SQL Server 2005 Express Installation
SQL Server Express is a free version of SQL Server offered by Microsoft. It is a relational database that the toolset uses to store information about the currently installed modules and campaigns. Most of the problems around the installation of the toolkit revolve around the installation of SQL Server Express 2005.
If you have no idea what any of these things mean it is recommended that you leave the default settings as they are.
If you have an existing SQL Server 2005 installation you wish to use uncheck Install MS SQL Express 2005 SP3. You'll then need to check Custom settings: and enter in the information for the database you already have.
Examples:
- My SQL Server 2005 machine is named VORTEX, and it does not have any instances installed on it. The database server for it would simply be VORTEX. The database name would remain bw_dragonage_content unless you have a reason to change it.
- My workstation also has a copy of SQL Server 2008 on it with no instances. I could reference this installation one of two ways. The first would be as BRIAN-PC; the other would be by using the period by itself.
- It should be noted that the . in the database server refers to the local machine; this should be replaced by the name of the machine on which your installation of SQL Server resides. The \BWDATOOLSET refers to the database instance on that machine.
The installer will attempt to connect to the SQL Server you specify and it will run a series of scripts against the database you provided. You should ensure that SQL Server is running on the appropriate machine and that you have no data you wish to save in the database you selected to install to.
Problems?
- Visit the official forums and search there before posting; the most common issues have solutions already posted.
- Check the Installation troubleshooting page.
- A log file will be created in your Documents folder during the installation. This is good to have handy if you have issues during installation. The file in question is named "Install Dragon Age Toolset.txt".
Once the configuration is to your liking click Install to continue.
Toolkit Installation
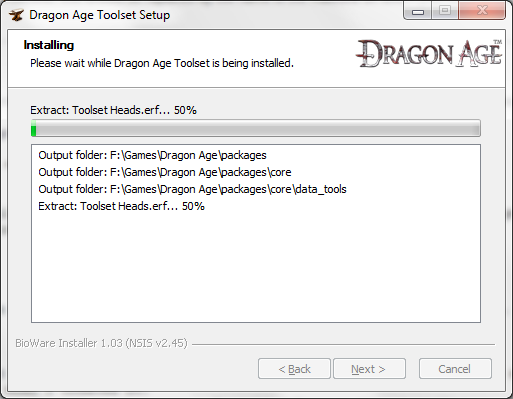
The installation will take some time. Grab a drink, use the restroom, put together a playlist for your listening pleasure.
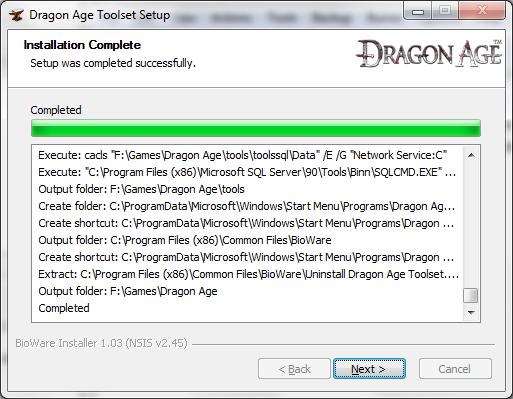
Toolkit Installation Finished Verification
The last item in the window above should be Completed. If there's anything else scroll up in the window until you find the error and copy and paste that error somewhere for safe keeping. Seek help in the forums or on the Internet, and restart the installation process.
Click Next to continue.
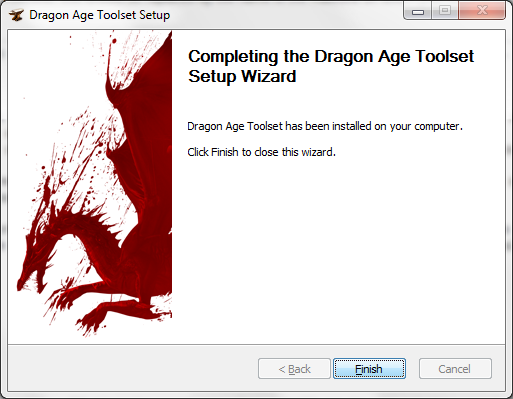
Toolkit Installation Finished
You're done. Assuming no unexpected errors appeared during the installation process you should be ready to start editing.
Click Finish to complete the installation.
Starting the Toolkit
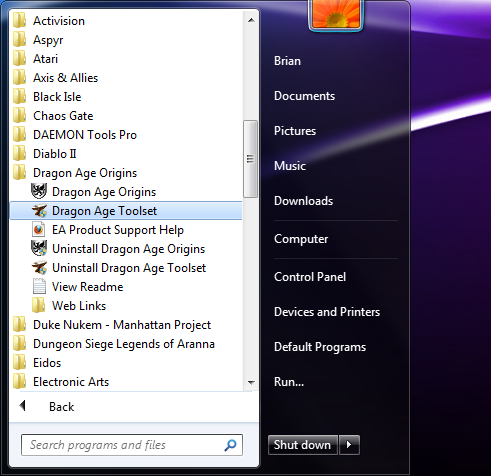
Find the Start Menu entry for the toolkit and click it. Give the toolkit some time to start up. As a benchmark, it takes approximately 12 seconds for the toolkit to start on my AMD Phenom 9850 with 4GB of RAM with a Windows Experience score 7.2.
Terminology
Learning something new is difficult. Concise terminology is required to give direction, but the terminology is usually somewhat recursive in definition. The following are some definitions that will help you navigate the remainder of this document.
- Module
- A module is the overarching container in which content is housed. It is the parent of all other content. The best comparison to the Dragon Age module are Dungeons and Dragons modules. Each module in D&D was a self contained adventure, complete with background, NPCs, maps, encounters, and any special rules which were to be in effect during the adventure.
- Area
- An area in a module is a self contained subset of the module, limited in size and/or scope. Areas are used to break the adventure into pieces, and are where the characters interact with the game. An area requires a level layout before it can be defined; see below. Items placed in an area are generally interactive, examinable, or dynamic in nature.
- Level
- A level defines the underlying static, immovable, non interactive portion of an area - structure and appearance. The level determines where PCs and NPCs can move (pathfinding) and lighting (ambient and otherwise). A level layout is required in order to define an area. A level can be created in one of two forms: terrain and room.
- Room
- A room
Modules
The toolset comes with two modules installed.
- The Single Player module is the campaign, and shouldn't be edited unless you want to modify the Dragon Age campaign itself. If you're creating an addin or mod for the official campaign, this is the module in which you'll want to work.
- The Demo module is installed for demonstration purposes by Bioware, and several other tutorials and forum posts refer to it.
You can easily determine which module you're editing by looking at the title bar of the toolbox. In the image the currently edited module is highlighted by the red rectangle; the example has the Single Player module loaded.
Until you're comfortable with the toolkit it's best to work in a module separate from either of the above modules.
Create A Module
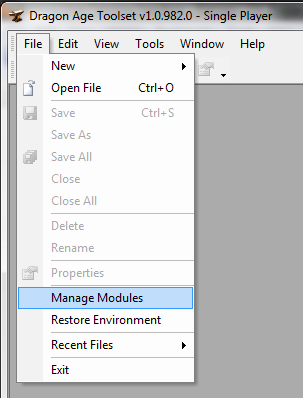
To create a module click File then Manage Modules.
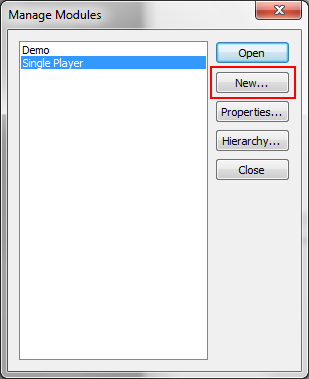
The Manage Modules window will appear. Click the New button to create a module.
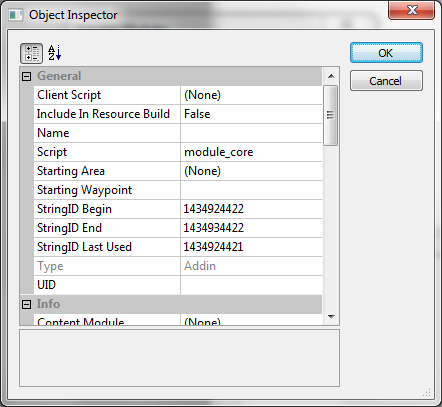
The Object Inspector window appears. All of these properties can be changed at a later date; our primary concern are the Name and UID properties.
- Name
- The name of the module is displayed to the player and is used if a Description String ID has not been set.
- UID
- The UID is not intended to be a GUID. It is used in some configuration files and is the name of the directory to which the module is exported.
We will return to the Module's Object Properties later as there are several important settings here.
Notes:
- Modules cannot be deleted from the toolset once they're created.
- The only valid module type is currently Addin. A module created as an Addin will appear under Other Campaigns in Dragon Age.
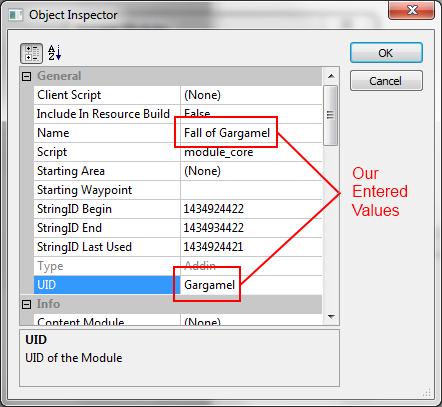
The image shows the module properties for the Fall of Gargamel module which we will be using for demonstration purposes.
This image gives you an idea as to where the values we're entering are being used. The menu shown is the Other Campaigns menu off the Dragon Age main menu. (The module will not show up until we export at least a portion of it; this is handled later.)
Here we can see that the directory in which our addin lives is named Gargamel, which corresponds to the UID value entered in the module properties. We can also see the various DLC items that have been installed from the game.
Note: On a Windows XP computer you'll find this directory in your My Documents folder.
