Making a new, playable module
Anyone who cares has probably gotten the toolset up and running, but in case you were struggling like me, here are some notes to save you a little time, hair, and anguish. You can sell those back to a vendor for a few copper.
Contents
Installing the Toolset
You can find the Wiki's main installation notes at [Installing_the_toolset]. First off, some installation notes:
- Make sure you have Activepython 2.5.x.x installed (or Python 2.5.x.x with Win32 extensions). You want those in BEFORE you get your toolset installed, and it does need to be the 2.5 version.
- There's also an updated LightMapper script. You get the LightMapper here.
More on these later, but most likely you will get to know the LightMapper very well.
Creating a Module
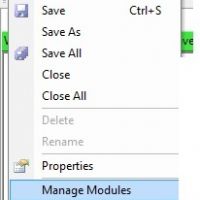
The first thing you should do is create a module. As you can see, you start with "Manage Modules," NOT with File-> New. When you installed the Dragon Age Toolset, you were also asked to install a SQL database, and this is where many Dragon Age resources are stored. This means that if you want to point to physical folders for reference, custom level files and so forth, you should make a folder yourself and put those resources in for you to mangle, er, use. Remember that 1) it's difficult to delete your module, unless you want to trash your SQL database and 2) even though modules are all called "addins," any module can either stand alone or be used to enhance an existing module. They are simply addins of the core of the game, not of any particular campaign.
Takeaways
- The Toolset uses a SQL database system to store information.
- Remember that it's difficult to delete modules or change their names because they are stored in the database.
- New modules are used as both addins or standalone campaigns.
Setting Up Your New Module
This is the quick and dirty way to make a brand new module. We'll get into adjusting the details as we go through this series.
Getting a basic usable character
I found it easiest to just cut and paste from Bryan Derksen's script from the Demo to start. Open up the Demo with Manage Modules and select the Script Palette in the Palette window on the right and you'll see some little gray can icons in the folder "Demo." Choose "Demo_Module" and you'll see the starting script for the Toolset Demo.
- You can copy and paste the basics of that script (Thanks Bryan Derksen!) into a script of your own. Just highlight his script and CTRL-C to copy.
- To set up basic character creation, create a new script by going into the File menu and selecting New > Script. Paste the text you just copied from the demo in, or use this more basic template:
#include "log_h"
#include "utility_h"
#include "wrappers_h"
#include "events_h"

void main()
{
    event ev = GetCurrentEvent();
    int nEventType = GetEventType(ev);
    string sDebug;
    object oPC = GetHero();
    object oParty = GetParty(oPC);
    int nEventHandled = FALSE;

    switch(nEventType)
    {
        case EVENT_TYPE_MODULE_START:
        {
            PreloadCharGen();
            StartCharGen(GetHero(),0);
            break;
        }
    }
    if (!nEventHandled)
    {
        HandleEvent(ev, RESOURCE_SCRIPT_MODULE_CORE);
    }
}
- Then open up Manage Modules on your own Module and select Properties.
- Right under the name of your module, there's a field labeled "Script" - use this to enter the starting script for your module.
Now you have good old fashioned Character Generation! We'll look at how to modify that a little later, as script writing is something you'll most likely get to delve deep into at some point in the future. Note that without Character Generation of this sort, you'll end up with a fairly ugly fellow named Jaden (Sorry Jaden) who has 0 for all stats and 1 HP.
Takeaways
- Use File > New to create new resources that you will need for your module.
- You can look at examples from the Demo, Single Player, or any other module for guidance.
- You have to have a script to make a new character in your module.
- A number of fairly basic features like character generation and moving between levels are controlled by scripting.
Setting up a basic level
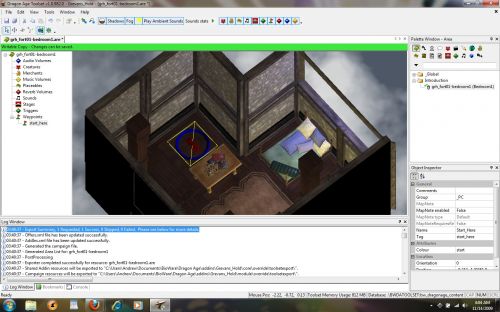
There's your Character, but now he needs a place to go. You can muck with the Level Editor for custom levels, but right now it may be more pain than I want to give you, so I'll talk about it a little later. For now, we'll stick with the default areas. Here's what you do: go File->New->Area and go through the motions of making a new area. Once you have it, go to the Area Palette and under your new area's properties, choose an Area Layout to make a map that you can walk around. First things first, you need to tell the module where your character will start. On the left-hand side, you'll see "Waypoints" - right-click there and insert a new one. Edit the name and tag of your Waypoint in its properties. You can also change its color to Start if that matters to you - I find it a little easier to recognize that way. There's a starting area now and a starting Waypoint, and this means you can adjust your module to include these by... yes, once more enter Manage Modules and choose Properties. Set the Starting Area to the area you just created, and the Starting Waypoint to the Waypoint that you just made.
Here's your first taste of mouse navigation in the toolset as well - by default: you can rotate with the Middle Mouse button, zoom with Scroll Wheel, and hold CTRL+left click to pan from side to side. Sorry, I'm not sure about one-button mouse options.
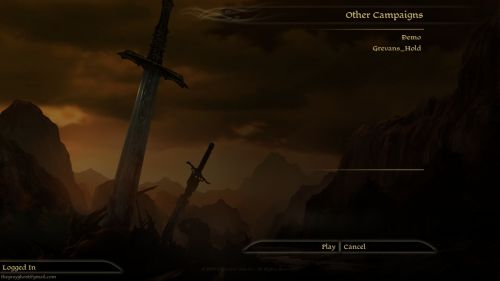
There you have it, you're done! Right? Not just yet - remember this info is stored in the database, but now you need to bring it into the game. Go to Tools->Export. We haven't added any special dependencies as we're just using the default resources right now, so choosing "Export without Dependent Resources" is perfectly fine. Do this to take your module and generate a campaign. The Log Window at the bottom will show the status of your action, including where the Campaign resource gets exported and if there were errors - hopefully not. Now when you go to DA, you'll be able to go to Other Campaigns and select your custom campaign!


