Difference between revisions of "Follower tutorial"
| Line 296: | Line 296: | ||
| − | To change these, just copy the appropriate two cells from | + | To change these, just copy the appropriate two cells from columns B&C or F&G over the ones you want to replace. |
For example, here we're copying Morrigan's template. Morrigan has Spider Shape high in her preferences, which we do not want. | For example, here we're copying Morrigan's template. Morrigan has Spider Shape high in her preferences, which we do not want. | ||
[[File:AlMori_talent_pref.jpg]] | [[File:AlMori_talent_pref.jpg]] | ||
| + | |||
| + | We decide we'd prefer Flame Blast, so we find it in columns B&C and copy both cells: | ||
| + | |||
| + | [[File:ALMori_copy.jpg]] | ||
Revision as of 05:40, 6 January 2010
Simple Follower Creation
Follow these steps to create a follower that
- Levels up with a default package
- Can be chosen from the party picker
- Can gain XP
This guide assumes you know how to create a creature and are comfortable with basic scripting.
You should only use this simple method if you are sure there will be empty space in the active party when your follower is recruited.
Create the creature
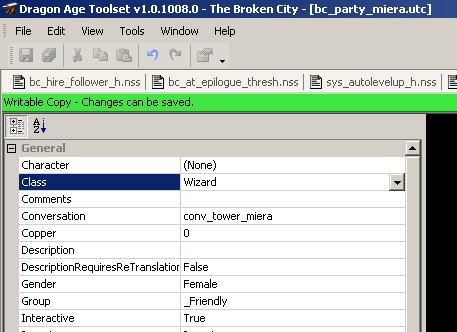
Create a creature to act as your follower. Set its name, appearance, gender, head morph, conversation, inventory etc as you want them to behave in-game.
Set an appropriate Tag (you'll be using it a lot). I suggest "party_charname".
Make sure you choose a Class. For most followers this should be Rogue, Warrior or Wizard.
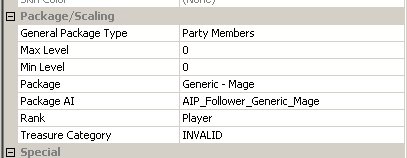
Under Package/Scaling set:
General Package Type to be Party Members
Package to be an appropriate value (probably "Generic - Wizard" or similar)
Package AI (there should only be one choice)
Rank to be Player
Save and export your character as normal.
Override char_stage
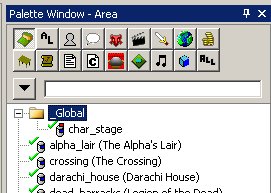
In your resource palette, open char_stage under the Global folder:
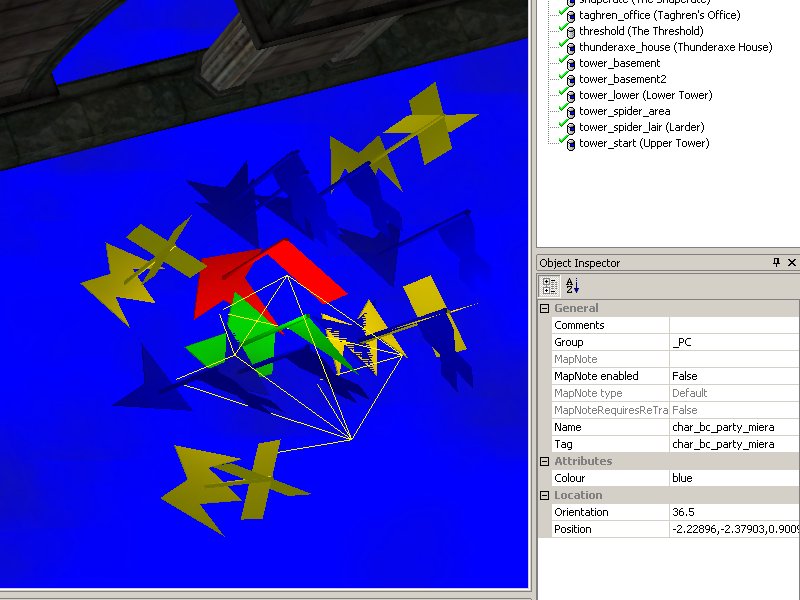
Create a new waypoint for your follower to appear on the party picker. This waypoint must have a tag in the form of "char_" followed by the exact tag of your follower.
In this example the tag of my follower is bc_party_miera so her waypoint tag must be char_bc_party_miera
For a standalone module (such as in this example), put your waypoint wherever you please. The illustrated one is directly on top of Morrigan's. For an add-in to the main campaign, you should position your wp appropriately relative to the core party members.
Save and export the area.
Move the char_stage.are and char_stage.lst files from your core export folder to your module's export folder (probably from \Documents\Bioware\Dragon Age\packages\core\override\toolsetexport to \Documents\Bioware\Dragon Age\AddIns\yourModule\module\override\toolsetoverride). This ensures that the modification to the character stage only takes effect if your module is installed and enabled, which will help manage compatibility problems. Make sure those files are included when you package your module for distribution.
Create m2DAs for the Party Picker
You will need to create two Excel spreadsheets.
The first should be named (both worksheet and file) partypicker_ with a unique suffix. In this example, my first spreadsheet is named partypicker_fofbc.xls with a worksheet name of partypicker_fofbc - the suffix being the acronym of my module.
Set up your columns as follows:
The ID for your follower must be 12 or higher. 11 is the highest value used in the base 2DA. 12 is fine for standalone modules, add-ins will probably want to use an arbitrarily high number to avoid potential conflicts.
The Label should be the follower's name as you wish it to appear on the party picker.
The Tag must be your follower's tag.
All other values are non-functioning defaults and should be specified as in the image above unless you know explicitly what you're doing.
The second spreadsheet should be named party_picker_ (note middle underscore). Once again append your unique suffix (in this example party_picker_fofbc.xls with party_picker_fofbc as its worksheet).
Set up your columns and data like so:
ID and Tag should match what you did in the first spreadsheet. Specify INVALID COLUMN for the third column.
If you're familiar with m2DAs, generate them from these files, copy them to your module's override directory, and skip to the next step. Otherwise, read on:
- Go to \Program Files\Dragon Age\tools\ResourceBuild\Processors (or wherever you installed Dragon Age)
- Copy ExcelProcessor.exe from that folder to whichever folder has the excel sheets you just created.
- Drag and drop your xls files onto ExcelProcessor. This will create .gda files.
- Copy these .gda files to your module's export directory (probably \Documents\Bioware\Dragon Age\AddIns\yourModule\module\override\toolsetoverride). Make sure they are included in your .dazip when the time comes to build your module.
If you are an OpenOffice user and have trouble with ExcelProcessor, you can use GDApp to directly create the 2DAs. It rocks!
Capture the EVENT_TYPE_PARTYMEMBER_ADDED Event
Amusingly enough, the Party Picker does not actually add followers to the party. However it raises an event that allows you to do so. Your module script needs to capture this event and execute some code.
The following example shows what to do with the event. The full script would work as a module script for an add-in (assuming it didn't need to do anything else), but otherwise you'll have to incorporate the event into your own script:
#include "utility_h"

void main()
{
    event ev = GetCurrentEvent();
    int nEventType = GetEventType(ev);
    switch(nEventType)
    {
        case EVENT_TYPE_PARTYMEMBER_ADDED:
        {
            object oFollower = GetEventObject(ev, 0);
            SetLocalInt(oFollower, CREATURE_REWARD_FLAGS, 0);  //Allows the follower to gain XP
            SetFollowerState(oFollower, FOLLOWER_STATE_ACTIVE);  //Adds follower to the active party
            break;
        }

    }
}
SetFollowerState(oFollower, FOLLOWER_STATE_ACTIVE) is the key statement to add the follower to the active party. You must have this.
SetLocalInt(oFollower, CREATURE_REWARD_FLAGS, 0) is a bug-fix, as followers hired with UT_HireFollower() do not receive XP by default. This statement fixes that, and I consider it best practice to keep it in this event to ensure it is always set. You will not wish to do this if you want a follower that should not gain XP to be on the party picker.
Note that you do not need to intercept the corresponding event for a party member being removed - the party picker handles spawning/despawning, and thus will successfully remove members.
Remember to save and export your module script.
Create Your Hiring Script
Now all that remains is to actually hire the follower :)
Create a script to handle the hiring (which will most likely be fired from a conversation). The script is quite simple:
#include "utility_h"

void main() {

        object oFollower = GetObjectByTag("bc_party_miera"); //Use CreateObject() if the creature isn't present in the module yet

        UT_HireFollower(oFollower);   //Hires the follower

        SetPartyPickerGUIStatus(2);

        ShowPartyPickerGUI();  //Shows the Party Picker; necessary for the follower to gain XP

}
Make sure you use your own follower's tag and not the example one :)
This script fires the party picker after hiring the follower. That is absolutely necessary via this method, as we have put the XP fix onto an event fired by the party picker. You cannot put the XP fix into this script, it must be called from a later one (the bug is caused by an errant call to an event in player_core, which will be executed AFTER this script).
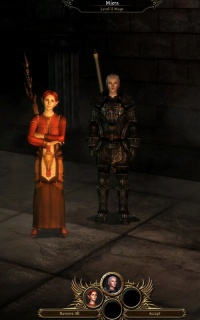
If everything worked, you should see something like this:
Advanced Follower Creation
Follow these steps to have full control over the creation of your follower, with options such as:
- Unique level-up template - Class and specialisation chosen via script - Any starting state - Level higher than the PC - Starts with a specialisation point rather than a specific specialisation - Set plot flags in the call to the hire script
Prepare Creature, char_stage and Party Picker m2DAs
Follow the same steps to create your create your follower creature, override char_stage and create your Party Picker m2DAs as above.
Create Party Plot
While not necessary, it's very helpful to have plot flags set when a follower is hired or joins/leaves the active party. This makes conversation interjections and the like very easy.
Create a plot with appropriate flags. There's no real need to associate journal text with them:
Add Plot Flags to Party Picker Event Intercept
We then update our module script to make use of that plot, like so:
#include "utility_h"
#include "wrappers_h"
#include "plt_bc_create_party"   //make sure you include your own plot, not mine

void main()
{
    event ev = GetCurrentEvent();
    int nEventType = GetEventType(ev);
    switch(nEventType)
    {
        case EVENT_TYPE_PARTYMEMBER_ADDED:
        {
            object oFollower = GetEventObject(ev, 0);
            SetLocalInt(oFollower, CREATURE_REWARD_FLAGS, 0);
            SetFollowerState(oFollower, FOLLOWER_STATE_ACTIVE);

            if (GetTag(oFollower) == "bc_party_miera") {               //You must explicitly test for your follower's tag.
                WR_SetPlotFlag(PLT_BC_CREATE_PARTY, PARTY_MIERA_IN_PARTY, TRUE);     //Make sure you use your own flags!
            }

            break;
        }

        case EVENT_TYPE_PARTYMEMBER_DROPPED:
        {
              object oFollower = GetEventObject(ev, 0);

              if (GetTag(oFollower) == "bc_party_miera") {
                WR_SetPlotFlag(PLT_BC_CREATE_PARTY, PARTY_MIERA_IN_PARTY, FALSE);     //As above, but set false.
              }

        }

    }
}
Create a Level Up Template
You can skip this step if you're content to use one of the generic Rogue, Wizard or Warrior templates, but I don't recommend it. Making a template that suits your character is easy and will almost always be better for the player than a generic one that spends points poorly.
Go to \Program Files\Dragon Age\tools\Source\2DA (or wherever you installed Dragon Age).
You should see a number of excel sheets of the form ALCharacter.xls (such as ALAlistair.xls, ALLeliana.xls, ALRogue_Default.xls etc). Open the one closest to your character (ie Morrigan or Wynne for a wizard, Leliana or Zevran for a rogue). Save a copy as ALYourcharacter.xls in whatever directory you're using to create your 2DAs, remembering to rename the worksheet ALYourcharacter (in this example, ALMiera.xls with ALMiera as its worksheet).
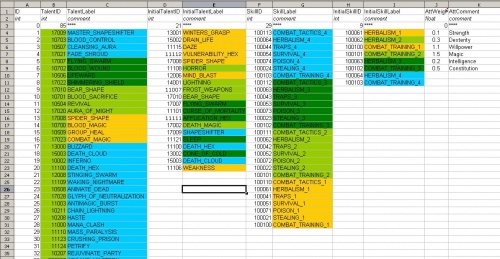
It should look something like this:
Columns B and C are the talents/spells available to this character. Do not change them.
Columns F and G are the skills available to this character. Do not change them.
We will edit the remaining columns like so:
Setting Stat Weights
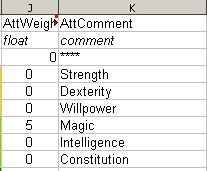
The stat weights in column J determine how the follower will spend their attribute points, in a rough ratio. So if Dexterity is set to 1.5 and Intelligence to 1, you should expect to see 3 points of Dex for every 2 points of Cunning in-game (note Intelligence is the label used in the toolset for Cunning).
Simply change the values in J to reflect how you'd like the character to spend their points. In this example we're creating a wizard, so we're not going to mess around:
This character will only raise magic. I set the value to 5 rather than something like 1 to provide room underneath for the other stats while still overwhelmingly favouring magic, but in practice I only really ever want that one stat.
Setting Talent and Skill Priorities
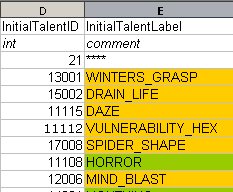
Columns D and E are the talents/spells that the character will buy, in preference order from top to bottom.
Columns H and I are the skills available to this character, in preference order from top to bottom.
To change these, just copy the appropriate two cells from columns B&C or F&G over the ones you want to replace.
For example, here we're copying Morrigan's template. Morrigan has Spider Shape high in her preferences, which we do not want.
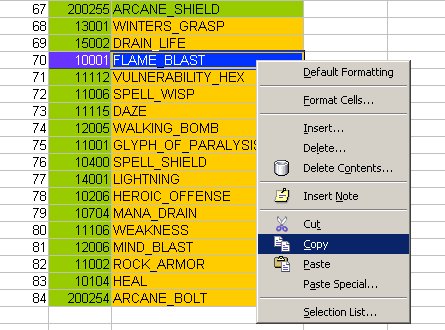
We decide we'd prefer Flame Blast, so we find it in columns B&C and copy both cells:
