Difference between revisions of "Area layout visual index"
(Created) |
m (Adding width parameter to galleries) |
||
| Line 2: | Line 2: | ||
== arena == | == arena == | ||
| − | <gallery widths=200px heights=115px perrow=4> | + | <gallery width=400px widths=200px heights=115px perrow=4> |
File:Arena.jpg|'''arena'''<br/>Small Castle Arena | File:Arena.jpg|'''arena'''<br/>Small Castle Arena | ||
File:Arena2.jpg|'''arena2'''<br/>Large Castle Arena | File:Arena2.jpg|'''arena2'''<br/>Large Castle Arena | ||
| Line 8: | Line 8: | ||
== brc == | == brc == | ||
| − | <gallery widths=200px heights=115px perrow=4> | + | <gallery width=800px widths=200px heights=115px perrow=4> |
File:Brc000d.jpg|'''brc000d'''<br/>Dalish Camp | File:Brc000d.jpg|'''brc000d'''<br/>Dalish Camp | ||
File:Brc100d.jpg|'''brc100d'''<br/>Brecilian Forest: West Brecilian Forest | File:Brc100d.jpg|'''brc100d'''<br/>Brecilian Forest: West Brecilian Forest | ||
| Line 28: | Line 28: | ||
== combat == | == combat == | ||
| − | <gallery widths=200px heights=115px perrow=4> | + | <gallery width=400px widths=200px heights=115px perrow=4> |
File:Combat.jpg|'''combat'''<br/>Open Combat Area | File:Combat.jpg|'''combat'''<br/>Open Combat Area | ||
File:Combat2.jpg|'''combat2'''<br/>Open Combat Area | File:Combat2.jpg|'''combat2'''<br/>Open Combat Area | ||
| Line 34: | Line 34: | ||
== den == | == den == | ||
| − | <gallery widths=200px heights=115px perrow=4> | + | <gallery width=800px widths=200px heights=115px perrow=4> |
File:den000d.jpg|'''den000d'''<br/>Denerim: Palace District: Palace Exterior (during attack) | File:den000d.jpg|'''den000d'''<br/>Denerim: Palace District: Palace Exterior (during attack) | ||
File:den001d.jpg|'''den001d'''<br/>Denerim: Palace District: Royal Palace | File:den001d.jpg|'''den001d'''<br/>Denerim: Palace District: Royal Palace | ||
| Line 76: | Line 76: | ||
== hrt == | == hrt == | ||
| − | <gallery widths=200px heights=115px perrow=4> | + | <gallery width=800px widths=200px heights=115px perrow=4> |
File:hrt000d.jpg|'''hrt000d'''<br/>Lothering | File:hrt000d.jpg|'''hrt000d'''<br/>Lothering | ||
File:hrt001d.jpg|'''hrt001d'''<br/>Lothering: Chantry | File:hrt001d.jpg|'''hrt001d'''<br/>Lothering: Chantry | ||
| Line 85: | Line 85: | ||
== lak == | == lak == | ||
| − | <gallery widths=200px heights=115px perrow=4> | + | <gallery width=800px widths=200px heights=115px perrow=4> |
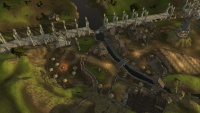
File:lak100c.jpg|'''lak100c'''<br/>Redcliffe Village (Attack) | File:lak100c.jpg|'''lak100c'''<br/>Redcliffe Village (Attack) | ||
File:lak100d.jpg|'''lak100d'''<br/>Redcliffe Village (Day) | File:lak100d.jpg|'''lak100d'''<br/>Redcliffe Village (Day) | ||
| Line 131: | Line 131: | ||
== lgt == | == lgt == | ||
| − | <gallery widths=200px heights=115px perrow=4> | + | <gallery width=800px widths=200px heights=115px perrow=4> |
File:lgt101d.jpg|'''lgt101d'''<br/>Lake Calenhad: The Spoiled Princess | File:lgt101d.jpg|'''lgt101d'''<br/>Lake Calenhad: The Spoiled Princess | ||
File:lgt300d.jpg|'''lgt300d'''<br/>Frostback Mountain | File:lgt300d.jpg|'''lgt300d'''<br/>Frostback Mountain | ||
| Line 143: | Line 143: | ||
== orz == | == orz == | ||
| − | <gallery widths=200px heights=115px perrow=4> | + | <gallery width=800px widths=200px heights=115px perrow=4> |
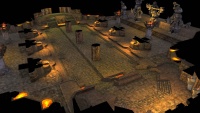
File:orz000d.jpg|'''orz000d'''<br/>Orzammar: Hall of Heroes | File:orz000d.jpg|'''orz000d'''<br/>Orzammar: Hall of Heroes | ||
File:orz100d.jpg|'''orz100d'''<br/>Orzammar Commons | File:orz100d.jpg|'''orz100d'''<br/>Orzammar Commons | ||
| Line 174: | Line 174: | ||
== ost == | == ost == | ||
| − | <gallery widths=200px heights=115px perrow=4> | + | <gallery width=800px widths=200px heights=115px perrow=4> |
File:ost000a.jpg|'''ost000a'''<br/>Ostagar Camp Night | File:ost000a.jpg|'''ost000a'''<br/>Ostagar Camp Night | ||
File:ost000c.jpg|'''ost000c'''<br/>Ostagar Camp Attack | File:ost000c.jpg|'''ost000c'''<br/>Ostagar Camp Attack | ||
| Line 188: | Line 188: | ||
== oth == | == oth == | ||
| − | <gallery widths=200px heights=115px perrow=4> | + | <gallery width=600px widths=200px heights=115px perrow=4> |
File:oth000d.jpg|'''oth000d'''<br/>The Fade (Harrowing) | File:oth000d.jpg|'''oth000d'''<br/>The Fade (Harrowing) | ||
File:oth001d.jpg|'''oth001d'''<br/>The Fade (Circle of Magi) | File:oth001d.jpg|'''oth001d'''<br/>The Fade (Circle of Magi) | ||
| Line 195: | Line 195: | ||
== rmt == | == rmt == | ||
| − | <gallery widths=200px heights=115px perrow=4> | + | <gallery width=600px widths=200px heights=115px perrow=4> |
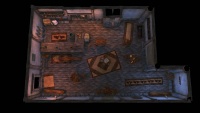
File:rmtst.jpg|'''rmtst'''<br/>Warehouse 3 Rooms Morning | File:rmtst.jpg|'''rmtst'''<br/>Warehouse 3 Rooms Morning | ||
File:rmtst01.jpg|'''rmtst01'''<br/>Warehouse 3 Rooms Night | File:rmtst01.jpg|'''rmtst01'''<br/>Warehouse 3 Rooms Night | ||
Latest revision as of 15:29, 13 August 2011
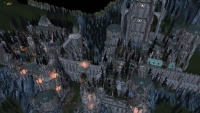
The Area layout visual index lists the area layouts included with the Toolset. The area layouts are grouped by common prefix.
arena
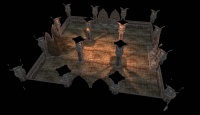
arena
Small Castle Arena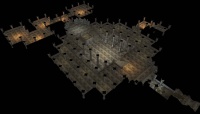
arena2
Large Castle Arena


brc
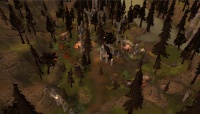
brc000d
Dalish Camp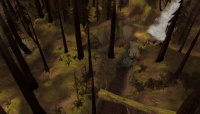
brc100d
Brecilian Forest: West Brecilian Forest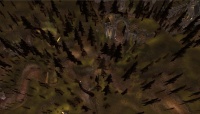
brc101d
Brecilian Forest: East Brecilian Forest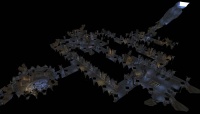
brc200d
Dalish Elf Origins: Elven Ruins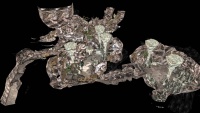
brc201d
Cavern (Unused?)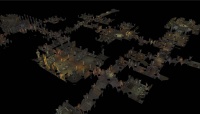
brc202d
The Brecilian Ruins: Lower Ruins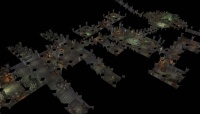
brc203d
The Brecilian Ruins: Lair of the Werewolves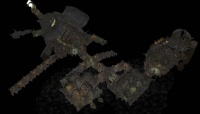
brc204d
The Brecilian Ruins: Ruins Upper Levels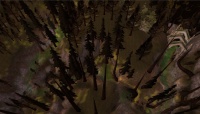
brc300d
Dalish Elf Origins: Forest Clearing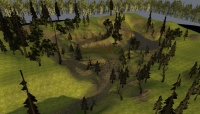
brc501d
Darkspawn Encounter: Field near a Lake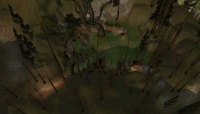
brc502d
Encounter: Twisted Forest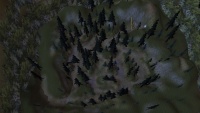
brc503d
Encounter: Twisting Roads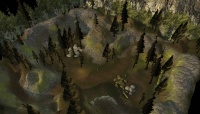
brc504d
Encounter: Kadan-Fe Camp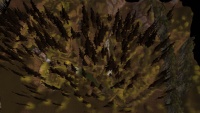
brc505d
Encounter: Marjolaine's Assassins (Road with river and waterfall)
brc997d
Dalish Elf Origins: Dalish Camp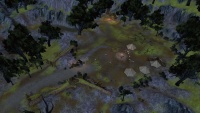
brc999d
Player Camp


combat
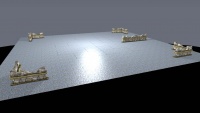
combat
Open Combat Area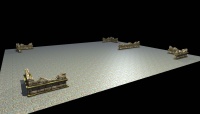
combat2
Open Combat Area


den
den000d
Denerim: Palace District: Palace Exterior (during attack)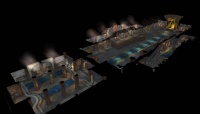
den001d
Denerim: Palace District: Royal Palace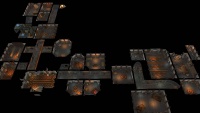
den005d
Denerim: Palace District: Arl of Denerim's: Interiors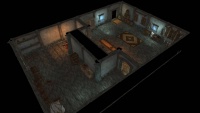
den009d
Haven Village: Store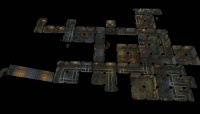
den011d
Denerim: Palace District: Arl of Denerim's: Dungeon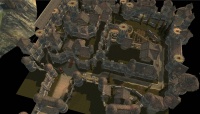
den012d
Denerim: Palace District: Arl of Denerim's: Exterior
den020d
Denerim: Market District: Gnawed Noble's Tavern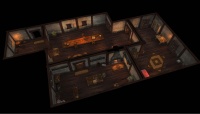
den101d
Denerim: Market District: Brother Genetivi's House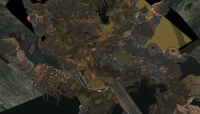
den200d
Denerim: Alienage: Day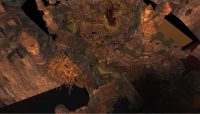
den200n
Denerim: Alienage: Night (during attack)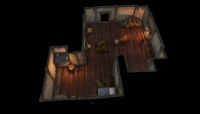
den201d
Denerim: Alienage: City Elf Origin's Home
den202d
Denerim: Alienage: Alarith's Store
den203d
Denerim: Alienage: Slum Apartments
den204d
Denerim: Alienage: Tevinter Hospice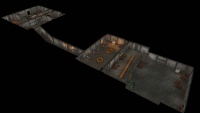
den206d
Denerim: Alienage: Slaver Compound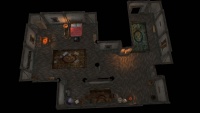
den207d
Denerim: Alienage: Valendrian's House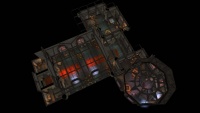
den308d
Haven Village: Chantry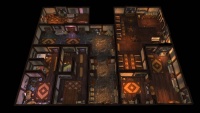
den312d
Denerim: South Docks: The Pearl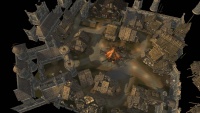
den400d
Denerim: Market District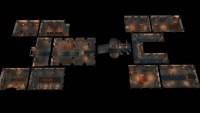
den401d
Denerim: Market District: Arl Eamon's Estate (First Floor)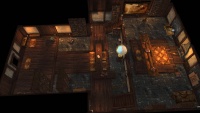
den403d
Denerim: Market District: Magic Shop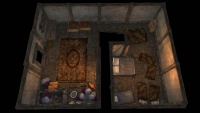
den404d
Denerim: House (small, multiple uses)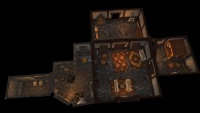
den405d
Denerim: House (large, Marjolaine encounter)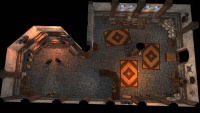
den407d
Denerim: Market District: Master Wade's Emporium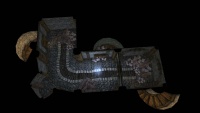
den408d
Denerim: Market District: Arl Eamon's Estate (Basement)
den500d
Denerim: Fort Drakon (Main Floor, during attack)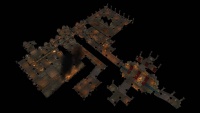
den501d
Denerim: Fort Drakon (Second Floor, during attack)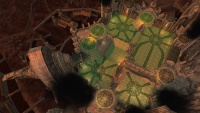
den502d
Denerim: Fort Drakon (Rooftop, during attack)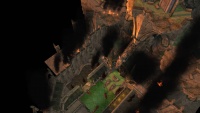
den504d
Denerim: Fort Drakon (Exteriors, during attack)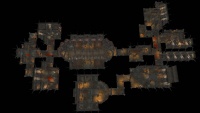
den505d
Denerim: Fort Drakon (Main Floor)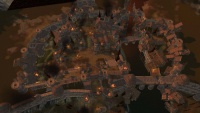
den510d
Denerim: City Gates (during attack)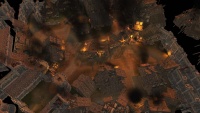
den520d
Denerim: Market District (during attack)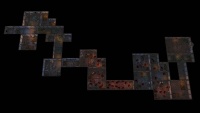
den600d
Denerim: Alienage: Abandoned Orphanage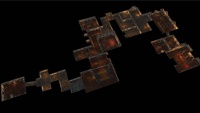
den601d
Denerim: South Docks: Bloodmage HQ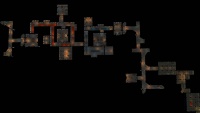
den602d
Denerim: Bann of West Hill's Estate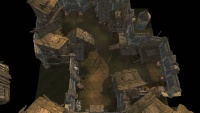
den900d
Denerim: Back Alley (Narrow)
den901d
Denerim: Back Alley (Wide)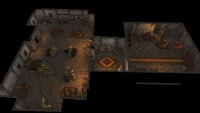
den998d
Denerim: Docks: Grey Warden Cache


hrt
hrt000d
Lothering
hrt001d
Lothering: Chantry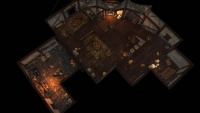
hrt002d
Lothering: Dane's Refuge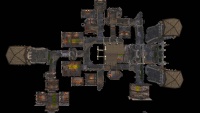
hrt201d
Highever/Cousland Castle: Human Noble Origins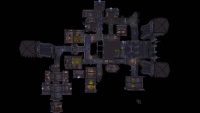
hrt201n
Highever/Cousland Castle: Human Noble Origins: Attack


lak
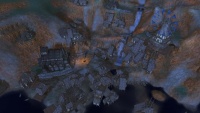
lak100c
Redcliffe Village (Attack)
lak100d
Redcliffe Village (Day)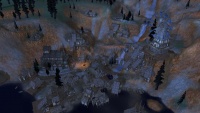
lak100n
Redcliffe Village (Night)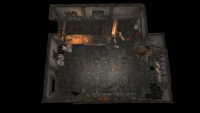
lak101d
Redcliffe: General Store (Oil Drums)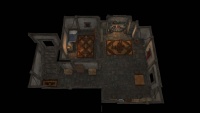
lak102d
Redcliffe: Katelyn's Home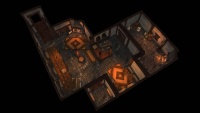
lak103d
Redcliffe: Tavern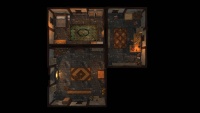
lak104d
Home 3 Rooms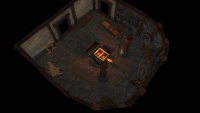
lak105d
Redcliffe: Blacksmith's Store
lak106d
Redcliffe: Chantry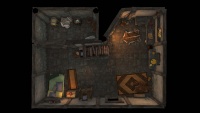
lak107d
Redcliffe: House (along wooden path)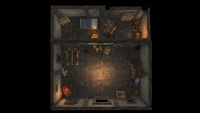
lak108d
Redcliffe: Dwyn's Home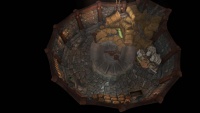
lak109d
Redcliffe: Windmill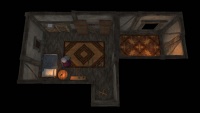
lak110d
Redcliffe: Katelyn's Home (Upstairs)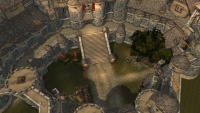
lak200d
Redcliffe: Castle Courtyard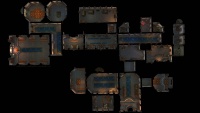
lak201d
Redcliffe: Castle (1st Floor)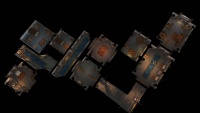
lak202d
Redcliffe: Castle (2nd Floor)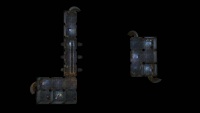
lak203d
Redcliffe: Castle (Basement)
lak250d
The Fade (Connor)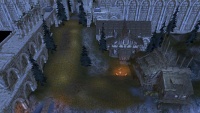
lak300d
Lake Calenhad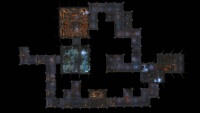
lak302d
The Circle Tower (Basement)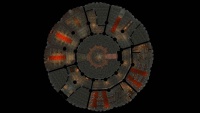
lak303d
The Circle Tower: Apprentice Quarters (1st Floor)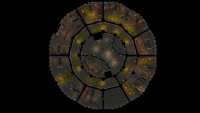
lak304d
The Circle Tower: Senior Mage Quarters (2nd Floor)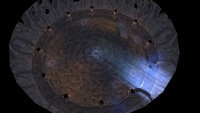
lak307d
The Circle Tower: Harrowing Chamber (5th Floor)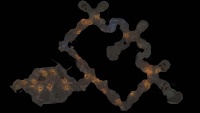
lak308d
The Circle Tower: Storage (Spiders)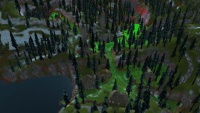
lak400d
Haven Village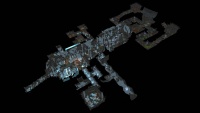
lak401d
Ruined Temple (1st Floor)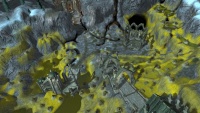
lak403d
Ruined Temple: Mountain Peak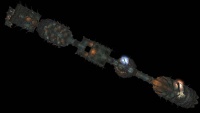
lak404d
Ruined Temple: The Gauntlet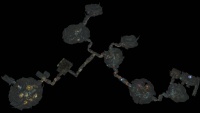
lak405d
Ruined Temple (2nd Floor)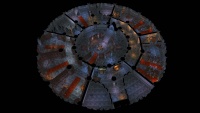
lak503d
The Circle Tower: Apprentice Quarters (1st Floor) Attack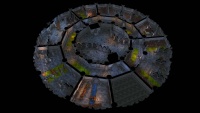
lak504d
The Circle Tower: Senior Mage Quarters (2nd Floor) Attack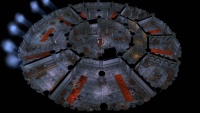
lak505d
The Circle Tower: The Great Hall (3rd Floor) Attack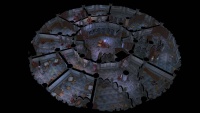
lak506d
The Circle Tower: Templar Quarters (4th Floor) Attack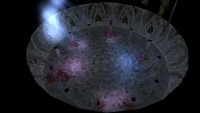
lak507d
The Circle Tower: Harrowing Chamber (5th Floor) Attack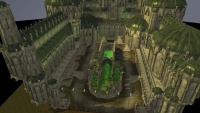
lak510d
Weisshaupt Fortress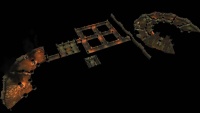
lak511d
Weisshaupt: The Burning Tower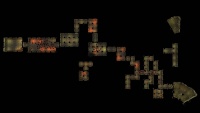
lak512d
Weisshaupt: The Darkspawn Invasion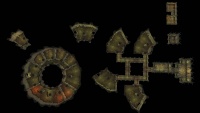
lak513d
Weisshaupt: The Mage's Asunder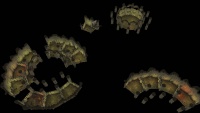
lak514d
Weisshaupt: The Templar's Nightmare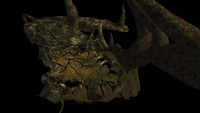
lak515d
Weisshaupt: Inner Sanctum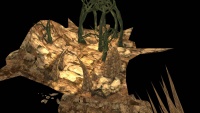
lak519d
Rocky Structure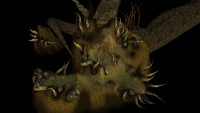
lak526d
Weisshaupt: A Nightmare


lgt
lgt101d
Lake Calenhad: The Spoiled Princess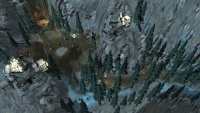
lgt300d
Frostback Mountain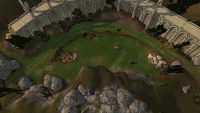
lgt600d
Outside Broken Bridge (Abandoned Meadow)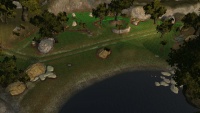
lgt601d
Outside Broken Bridge 2 (Roadside)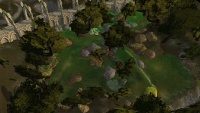
lgt602d
Outside Broken Bridge 3 (Old Tegrin)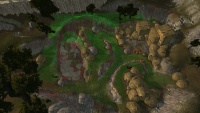
lgt603d
Outside Broken Bridge 4 (Hillside Path)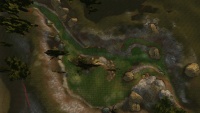
lgt604d
Outside Broken Bridge 5 (Zevran Attack)
lgt605d
Outside Broken Bridge 6


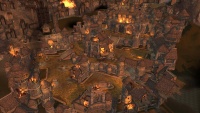
orz
orz000d
Orzammar: Hall of Heroes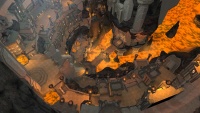
orz100d
Orzammar Commons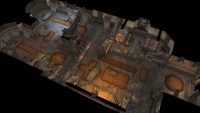
orz101d
Orzammar Commons: Tapster's Tavern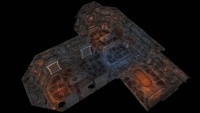
orz102d
Orzammar Commons: Janar's Armorers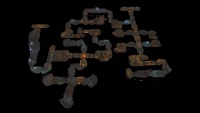
orz103d
Orzammar Commons: Jarvia's Carta Hideout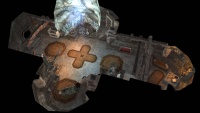
orz105d
Orzammar Commons: Figor's Imports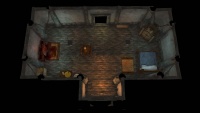
orz106d
Small Home
orz107d
Orzammar Commons: Orzammar Chantry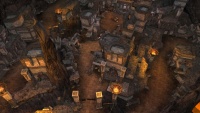
orz200d
Orzammar Dust Town
orz201d
Orzammar Dust Town: Slums Home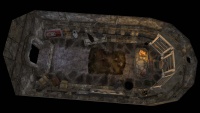
orz203d
Orzammar Dust Town: Alimar's Emporium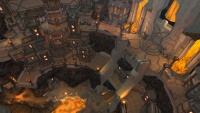
orz300d
Orzammar Diamond Quarter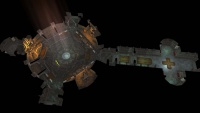
orz301d
Orzammar Diamond Quarter: The Assembly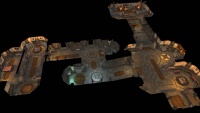
orz302d
Orzammar Diamond Quarter: Harrowmont's Estate
orz303d
Orzammar Diamond Quarter: Royal Palace
orz304d
Orzammar Diamond Quarter: Shaperate
orz500d
Orzammar Commons: The Proving
orz601d
Orzammar Prison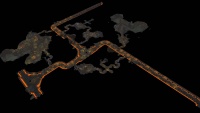
orz700d
The Deep Roads: Caridin's Cross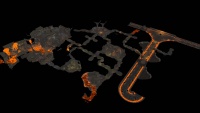
orz701d
The Deep Roads: Aeducan Thaig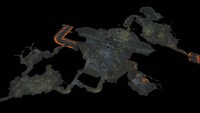
orz702d
The Deep Roads: Ortan Thaig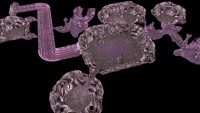
orz703d
The Deep Roads: Unfinished Area (No Lava)
orz704d
The Deep Roads: Drawf Noble Origins: Thaig Chamber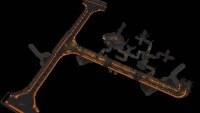
orz800d
The Deep Roads: Dwarf Noble Origins: Deep Roads Outskirts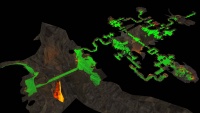
orz900d
The Deep Roads: The Dead Trenches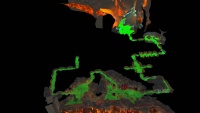
orz901d
The Deep Roads: Anvil of the Void
orz999d
The Deep Roads: Unused Map?


ost
ost000a
Ostagar Camp Night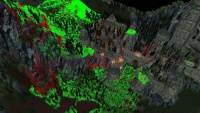
ost000c
Ostagar Camp Attack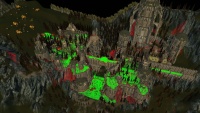
ost000t
Ostagar Camp Day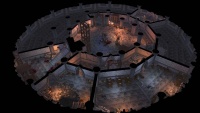
ost001d
Tower of Ishal (First Floor)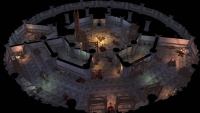
ost002d
Tower of Ishal (Second Floor)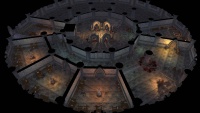
ost003d
Tower of Ishal (Third Floor)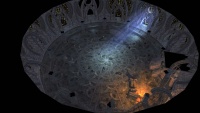
ost004d
Tower of Ishal (Top Floor)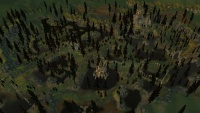
ost100d
Korcari Wilds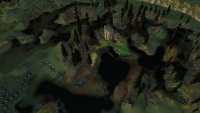
ost101d
Outside Flemeth's Hut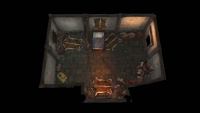
ost102d
Inside Flemeth's Hut


oth
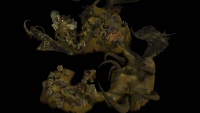
oth000d
The Fade (Harrowing)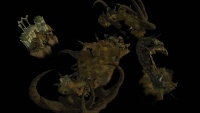
oth001d
The Fade (Circle of Magi)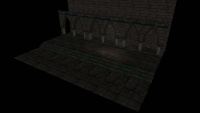
oth999d
Party picker


rmt

rmtst
Warehouse 3 Rooms Morning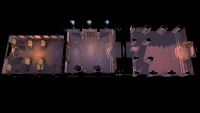
rmtst01
Warehouse 3 Rooms Night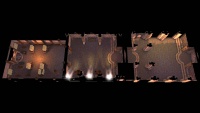
rmtst03
Warehouse 3 Rooms Afternoon


