Difference between revisions of "Adding custom heraldry to a shield tutorial"
(→Image) |
|||
| Line 2: | Line 2: | ||
You will need Photoshop with the Nvidia DDS plug-in (or similar). See [[DDS]] for general advice on tools. | You will need Photoshop with the Nvidia DDS plug-in (or similar). See [[DDS]] for general advice on tools. | ||
| + | |||
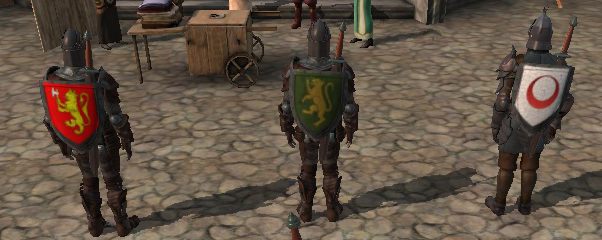
| + | [[Image:Heraldry demo1.jpg|center|See discussion below]] | ||
== Image == | == Image == | ||
Revision as of 13:32, 29 June 2010
This is a brief summary of how to add custom heraldry to a shield.
You will need Photoshop with the Nvidia DDS plug-in (or similar). See DDS for general advice on tools.
Contents
Image
You'll need a custom image for the new heraldry.
If your artistic skills are limited, Free Heraldry Clipart is an open source of images. They're mostly line drawings, which you can colour in Photoshop, using the Paint Bucket tool. If you're looking for a particular emblem (a lion, for example), try the Google search
site:www.heraldicclipart.com/catalog lion
Texture
Now you need to make the DDS file.
Unless you have a tool which can manipulate the alpha channel, it's best to start from an existing example.
Open the following file in the toolset:
C:\Program Files\Dragon Age\packages\core\data\textures.erf
Export some of the heraldry textures (prefixed h_) so that you can examine them using a tool which allows you to see the alpha channel.
Note that the alpha channel contains a mask which determines which part of the original shield texture is over-written by heraldry.
Choose one that is roughly the right shape - for example, h_primalora_0.dds is a good shape for a kite shield.
Open it in Photoshop.
If you like, you can resize the mask (Image > Resize > Image Size). If you do that, you must crop the image (or resize the background) so that it remains exactly 512 x 512 pixels.
Over-write the image with your custom heraldry, using Paste Into (not Paste, which destroys the alpha channel mask!).
It doesn't matter if your custom image is slightly bigger than the original, but bear in mind that only the masked portion will be visible in DAO.
Save the file with a new name (e.g. h_new.dds) in dds format with the following options : DXT5, mipmap 1/10, generate mip maps.
(Even if you are trying to over-write an existing Bioware texture, it's good practice to use a new name).
Check that your new dds file is the same size as the original, with the correct alpha mask.
To check the mip maps, open it in Photoshop with the "load mipmaps" option - you should see 7 progressively smaller versions of the same image.
Put the dds file in your module override folder.
M2DA
Make an M2DA based on Heraldry.xls.
Unless you want to over-ride an existing Bioware heraldry, give your entry a new, unique ID number.
All that this table contains is a name for your heraldry (for use in the toolset), and the name of your dds file.
Owing to a bug, your new ID numbers probably need to be in the range 0-255 - otherwise, your heraldry will work in the toolset, but not in game.
Item
Make a new item, then set the heraldry property from the drop-down box.
Troubleshooting
If you can't see your heraldry in the drop-down box, you may need to close and reopen the toolset, so that it loads your M2DA.
If you can't see your new logo on the 3D preview of the item, double-check that the DDS file is in exactly the right format (especially the alpha channel). Games are very picky about this!
If you can see your heraldry on the item in the toolset, but not when equipped on creatures (in the toolset, or in game), ensure that your M2DA ID is in the range 0-255.
