Morph
| Creature topics: |
|---|
|

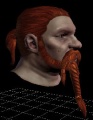
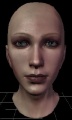
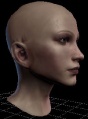
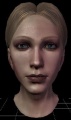
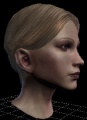
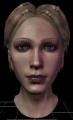
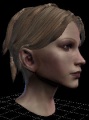
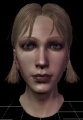
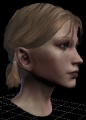
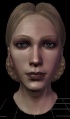
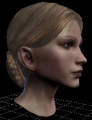
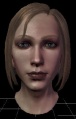
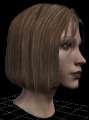
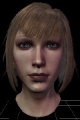
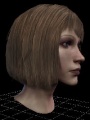
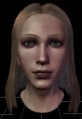
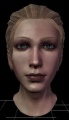
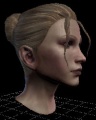
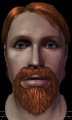
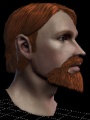
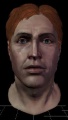
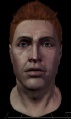
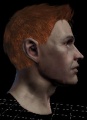
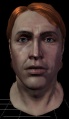
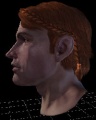
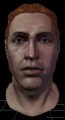
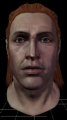
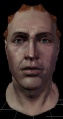
Morphs are highly customizable heads that can be added to many of the common humanoid creatures in Dragon Age to create unique characters. They are not listed on the palette window; to create a new morph you'll have to go to the "File" menu, select "New", and then select "Morph" from the list of resource types.
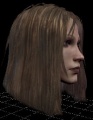
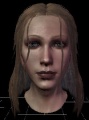
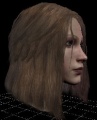
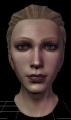
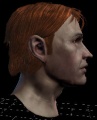
A morph must first start with a basic head shape. Select one from the drop-down menu in the toolbar (it defaults to "choose base", indicating the need to select one) and the head will appear in the main display. The camera can be maneuvered around it using many of the same basic controls used elsewhere in the toolset. The head bases that are available include male and female versions of Human, Dwarf, Elf, and a gender-neutral child's head.
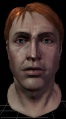
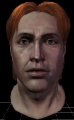
Once the base is selected, an enormous number of options will become available in the object inspector for modifying the exact shape and texture of the head. Hairstyles and beards can be added, tattoo textures can be overlaid on the skin, and so forth - there are hundreds of parameters.
To speed the creation of unique generic NPCs, the "randomize" button in the toolbar will set the various shape parameters to random values. This doesn't affect all facial features, however, since many of the adjustable features would look quite bizarre when set to extreme values. Generally the effects of the randomize button are limited to tabs 4 through 8, and it doesn't affect all of the features even on those. Manual customization may still be required to produce a truly diverse crop of NPCs.
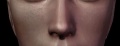
Note that for some features (for example, lip color) the opacity defaults to 0%, so you may not see an immediate effect when changing them unless you set the opacity higher first.

Contents
How to override companion & NPC Morphs
1. Open toolset
2. File --> Manage Modules --> Switch to single player campaign
3. Open the "Creatures" palette and put the name of the companion or npc in the filter. Example: "alistair"
4. A few tabs open up.... Expand the "_Global/Followers" folder and you will see alistair's model, (i also included npc example):
companion:
gen00fl_alistair (Alistair)
npc:
ntb100cr_gheyna (Gheyna)
5. For companions REMOVE THE NUMBERS. For NPCs REMOVE the letters between the number and the _ ... Compare these to the ones in step 4:
companion:
genfl_alistair
npc:
ntb100_gheyna.mor
6. Then add the appropriate prefix.
ef_         = elf female
hm_         = human male
hf_         = human female
em_         = elf male
dm_         = dwarf male
df_         = dwarf female
7. So you would rename your morph:
companion:
hm_genfl_alistair.mor
npc:
ef_ntb100_gheyna.mor
8. Then place it into the folder:
\Documents\BioWare\Dragon Age\modules\Single Player\override
Examples:
Alistair: hm_genfl_alistair.mor
Morrigan: hf_genfl_morrigan.mor
Gheyna: ef_ntb100_gheyna.mor
If you wish to override morphs in BioWare's DLC, you can find a list of morph names here: DLC morph names. You can download the source files for the head morphs in the main campaign from here: [1].
Beards and facial features
There are two basic types of beards available for facial morphs; model beards and stubble beards. Stubble beards are simply a texture overlay, and have no particular special effects associated with them. Model beards are three-dimensional objects that are affixed to the face, and it is important to be aware of certain limitations that come with using them.
In order to make a physical beard model fit properly onto the face, some facial features must be set to their default values. This is so that, as an example, one doesn't wind up with the tip of the chin poking out through the end of the beard. When you add a physical beard model to a head morph these specific facial features are automatically snapped to their default values and are locked there for as long as the beard is in place. If the beard is removed they become editable again, but it is important to note that they do not return to whatever values they had before the beard was added. So make the decision on whether a character has a physical beard before you spend a lot of time adjusting his jawline and other such details.
Debug features
There are a number of features with "debug" in their names that are intended only to allow a facial artist to get a better view of certain parts of a facial morph, and if they are set to anything other than zero the morph won't be usable by the rest of the toolset. The most obvious example is the "teeth debug" parameter, which pulls the lips back to expose the model's teeth so that they can be adjusted in plain view.
How to use a morph in your module
Morph is an art tool, not a design tool, and so it uses a somewhat different mechanism for making its output available to the designer than the other tools that come with the toolset. You can save a morph as a file in your regular filesystem but when you go to select a head morph in the creature designer you won't be able to import directly from the filesystem to use it.
Instead, you need to export the morph via the "post to local" command under the "Tools"->"Export" menu (alternately, right-click on the morph's display window and select "post to local" from the menu). Once the morph has been exported, it will be available in the creature creator's morph list when the appropriate body appearance model is selected (eg, a human female head morph is usable with a human female body appearance). For Example, if your Filename was "Sarah" and your Base Model was Human Female the Name in the List will be "hf_Sarah". You can find the prefix name at the beginning of the base Model Name.
If you want to make a slight variation on an existing morph (say for example to change the hair colour or add a scar), load the mrh file of the desired morph, and then 'save as' with a new file name. Make your changes and save, then once again export to local. To make the new variant available, use "View"->"Refresh".
How to replace the morph of an in game NPC (Single Player Campaign)
1. Open Toolset
2. Click the "Creatures" Button on the top right Palette Window
3. In the filter type the name of the NPC, example Bella or Desire or Murdock.
4. You'll see some folders appear. Navigate through them and find the NPC object:
Example: ntb100cr_gheyna (Gheyna)
5. Now left click that creature to highlight it.
6. On the bottom right the object inspector window appears full of information.
7. Scroll down the list until you see head morph, under appearance. Note the name of that file.
8. Rename the new morph file you exported to the name in the object inspector.
9. Now place your new morph in the following directory:
documents/bioware/dragon age/packages/core/override
Make sure you restart dragon age.
Morph files
There are actually two files for every morph.
- .mrh - This is the source file for the morph data and can be saved anywhere and loaded from anywhere.
- .mor - This is the generated/processed binarized gff file that the game uses. You can change these in the toolset but it's not recommended.
To get the *.mor file you need to use the "export" command.
To edit an existing .mrh, you can either drag and drop the .mrh into the toolset or open the *.mrh from the toolset.
The head morph tool concatenates the two letter prefix (HM for human male, HF for human female, etc.) to the filename for you. If you saved a resource called "myhead", for example, and it was a human male then it would export a hm_myhead.mor. If it was a female dwarf it would save it as df_myhead.mor
The drop down for the head morph will also auto generate the two letter prefix based on the gender and appearance of the creature you are making.
Deleting a morph
Morphs are an art asset, and as such are not stored in the database in the same manner as other resources. You can find morph files (.mor extension) in the \Dragon Age\packages\core\override\toolsetexport directory, to remove one simply delete it.
Parameters
- Keep in mind that when selecting colors, you can open up a dropdown list where you browse for colors, and choose "All Tint Files *.tnt" to get a much wider range of color choices. The Tattoo colors especially (t1_tat_*) are very vibrant, and can give you 'very blue eyes', for example.
Choose Base model name:
- HM_UHM_BASE - Human Male
- HF_UHM_BASE - Human Female
- DM_UHM_BASE - Dwarven Male
- DF_UHM_BASE - Dwarven Female
- EM_UHM_BASE - Elven Male
- EF_UHM_BASE - Elven Female
- QM_UHM_BASE - Qunari Male
- KN_UHM_BASE - Child
- (Opacity 0.00 least color - 1.00 full color)
- (Anything 0.00 to 1.00 or -1.00 to 1.00 is a slider)
- (Left and Right = Left and Right of Morph Face not Left and Right as you look at the face.)
01. MATERIAL:
01. Face:
- Skin Color: 8 choices
- Lip Makeup Color: 27 choices
- Lip Makeup Opacity: 0.00 - 1.00
- Blush Makeup Color: 30 choices
- Blush Makeup Opacity: 0.00 - 1.00
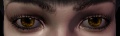
- Eye Makeup Color: 36 choices
- Eye Makeup Opacity: 0.00 - 1.00
02. Skin Texture:
- Base Skin Texture: 12 choices
- Blend Skin Texture: 12 choices
- Blend Right Eye: 0.00 - 1.00
- Blend Left Eye: 0.00 - 1.00
- Blend Right Cheek: 0.00 - 1.00
- Blend Left Cheek: 0.00 - 1.00
- Blend Left Forehead: 0.00 - 1.00
- Blend Right Forehead: 0.00 - 1.00
- Blend Nose: 0.00 - 1.00
- Blend Middle Forehead: 0.00 - 1.00
- Blend All Override: 0.00 - 1.00
03. Skin Type:
- Blend Right Eye: 0.00 - 1.00
- Blend Left Eye: 0.00 - 1.00
- Blend Right Cheek: 0.00 - 1.00
- Blend Left Cheek: 0.00 - 1.00
- Blend Left Forehead: 0.00 - 1.00
- Blend Right Forehead: 0.00 - 1.00
- Blend Nose: 0.00 - 1.00
- Blend Middle Forehead: 0.00 - 1.00
- Blend All Override: 0.00 - 1.00
02. PART SELECTION:
1. Model: (Base model Chosen when starting.)
2. Parts:
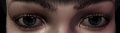
- Eye Color: 11 choices
- Eyes: 2 choices
- Eye Texture: 16 choices
- Hair and Beard Color: 10 choices
- Hair: 17 choices
- Beard: 7 choices
- Eye Lashes: 1 choice
- Lashes Texture: 4 choices
3. Tattoo:
- Tattoo Mask: 14 choices
- Tattoo Channel 1 Color: 15 choices
- Tattoo 1 : R Channel: 0.00 - 1.00
- Tattoo Channel 2 Color: 15 choices
- Tattoo 2 : G Channel: 0.00 - 1.00
- Tattoo Channel 3 Color: 15 choices
- Tattoo 3 : B Channel: 0.00 - 1.00
- Tattoo Channel 4 Color: 15 choices
- Tattoo 4 : A Channel: 0.00 - 1.00
4. Brow and Stubble:
- Brow and Stubble Colors: 10 choices
- Bushy Eyebrows: 0.00 - 1.00 (only available if regular eyebrows set to 0.00)
- Regular Eyebrows: 0.00 - 1.00
- Thick Eyebrows: 0.00 - 1.00 (only available if regular eyebrows set to 0.00)
- Thinned Eyebrows: 0.00 - 1.00 (only available if regular eyebrows set to 0.00)
- Goatee: 0.00 - 1.00
- Soul Patch: 0.00 - 1.00
- Mustache: 0.00 - 1.00
- Pork Chops: 0.00 - 1.00
5. Crew Cut Selection:
- Sheppard: 0.00 - 1.00
- Receeding Hairline: 0.00 - 1.00
- Balding Hairline: 0.00 - 1.00
03. FEATURE SELECTION:
01. Shape:
- Head Shape 01: 0.00 - 1.00
- Head Shape 02: 0.00 - 1.00
- Head Shape 03: 0.00 - 1.00
- Head Shape Fat: 0.00 - 1.00
- Head Shape Thick: 0.00 - 1.00
- Head Shape Thin: 0.00 - 1.00
- (You can only choose to adjust one of these shapes.)
02. Nose:
- Eastern Nose: 0.00 - 1.00
- Flat Nose: 0.00 - 1.00
- Long Nose: 0.00 - 1.00
- Pig Nose: 0.00 - 1.00
- Straight Nose: 0.00 - 1.00
- Thick Nose: 0.00 - 1.00
- (You can only choose to adjust one of these shapes.)
03. Eye Shape:
- Eye Shape 01: 0.00 - 1.00
- Eye Shape 02: 0.00 - 1.00
- Eye Shape 02: 0.00 - 1.00
- Eye Shape 04: 0.00 - 1.00
- (You can only choose to adjust one of these shapes.)
04. Universal Shapes:
- Shape Chubby: 0.00 - 1.00
- Shape Skinny: 0.00 - 1.00
- (You can adjust both of these.)
Reset
- (Left clicking in box to right resets all selections to 0.00)
04. NOSE:
01. Targets:
- Nose Bend Left/Right: -1.00 - 1.00
- Nose Bridge In/Out: -1.00 - 1.00
- Nose Bridge Thin/Wide: -1.00 - 1.00
- Nose Up/Down: -1.00 - 1.00
- Nose Out/In: -1.00 - 1.00
- Nose Smaller/Larger: -1.00 - 1.00
- Nose Tip Up/Down: -1.00 - 1.00
- Nose Tip Out/In: -1.00 - 1.00
- Nostrils Narrow/Wide: -1.00 - 1.00
02. Shape:
- Nose Shape 1: 0.00 - 1.00
- Nose Shape 2: 0.00 - 1.00
- Nose Shape 3: 0.00 - 1.00
- Nose Shape 4: 0.00 - 1.00
- Nose Shape 5: 0.00 - 1.00
- Nose Shape 6: 0.00 - 1.00
- (You can choose to adjust any or all of these.)
Reset
- (Left clicking in box to right resets all selections to 0.00)
05. MOUTH:
01. Targets:
- Mouth Back/Forward: -1.00 - 1.00
- Mouth Corner Up/Down: -1.00 - 1.00
- Mouth Up/Down: -1.00 - 1.00
- Mouth Lips Fat/Thin: -1.00 - 1.00
- Mouth Lower Lip Fat: 0.00 - 1.00
- Mouth Lower Lip Up: 0.00 - 1.00
- Mouth Narrow/Wide: -1.00 - 1.00
- Mouth Over/Underbite: -1.00 - 1.00
- Mouth Upper Lip Down: 0.00 - 1.00
- Mouth Upper Lip Fat: 0.00 - 1.00
Reset
- (Left clicking in box to right resets all selections to 0.00)
06. EYES:
01. Targets:
- Eye Bags: 0.00 - 1.00
- Eye Brow Back/Forward: -1.00 - 1.00
- Eye Brow Down/Up: -1.00 - 1.00
- Eye Narrow/Wide: -1.00 - 1.00
- Eye Position Down/Up: -1.00 - 1.00
- Eyelash Fan: 0.00 - 1.00
- Eyelash Length: 0.00 - 1.00
- Eyes Back/Forward: -1.00 - 1.00
- Eyes Larger: 0.00 - 1.00
- Eyes Small: 0.00 - 1.00
- Eyes Squint: 0.00 - 1.00
02. Debug
Debug Cornea Larger/Smaller: -1.00 - 1.00
Reset
- (Left clicking in box to right resets all selections to 0.00)
07. CHEEKS:
01. Targets:
- Cheeks Back/Forward: -1.00 - 1.00
- Cheeks Bones In/Out: -1.00 - 1.00
- Cheeks Gaunt: 0.00 - 1.00
- Cheeks Lower: 0.00 - 1.00
- Cheeks Up: 0.00 - 1.00
- Cheeks Wide: 0.00 - 1.00
Reset
- (Left clicking in box to right resets all selections to 0.00)
08. JAW:
01. Targets:
- Jaw Chin Down/Up: -1.00 - 1.00
- Jaw Chin In/Out: -1.00 - 1.00
- Jaw Chin Thin/Wide: -1.00 - 1.00
- Jaw Lower: 0.00 - 1.00
- Jaw Narrow/Wide: -1.00 - 1.00
- Jaw Square Shape: 0.00 - 1.00
Reset
- (Left clicking in box to right resets all selections to 0.00)
10. TEETH:
01. Targets:
- TeethChippedtoothLeft: 0.00 - 1.00
- TeethChippedtoothRight: 0.00 - 1.00
- TeethMissingLeft: 0.00 - 1.00
- TeethNoFront: 0.00 - 1.00
- Teeth Back/Forward: -1.00 - 1.00
- Teeth Close/Separate: -1.00 - 1.00
- Teeth Down/Up: -1.00 - 1.00
02. Debug:
- Teeth Wide/Narrow: -1.00 - 1.00
- Teeth Debug: 0.00 - 1.00
Reset
- (Left clicking in box to right resets all selections to 0.00)
11. EARS:
01. Targets:
- Ears Down/Up: -1.00 - 1.00
- Ears In/Out: -1.00 - 1.00
- Ears Large/Small: -1.00 - 1.00
- Ears Rotate Outwards: 0.00 - 1.00
- Ears Wide/Narrow: -1.00 - 1.00
02. Debug:
Ears Debug for Hair Crashing: 0.00 - 1.00
Reset
- (Left clicking in box to right resets all selections to 0.00)
12. NECK:
01. Targets:
- NeckApple: 0.00 - 1.00
- NeckThin: 0.00 - 1.00
- Neck Back: 0.00 - 1.00
- Neck Wide: 0.00 - 1.00
Reset
- (Left clicking in box to right resets all selections to 0.00)
13. BROWS:
01. Targets:
- Brow Down/Up: -1.00 - 1.00
- Forehead Out/In: -1.00 - 1.00
Reset
- (Left clicking in box to right resets all selections to 0.00)
13. VIEW SETTINGS:
1. Light:
- Light Model: 6 choices
- Light Probe: 4 choices
2. Camera:
- Distance: Numeric
- Orientation: 3 coordinates
- Position: 3 coordinates
3. Object:
- Orientation: 3 coordinates
- Position: 3 coordinates
4. Facial Animation:
- FA name: Blank
- FA set: 5 choices
14. EXPORT SETTINGS
General:
Export .mop file: True/False (False default)
14. UNIQUE SHAPES:
01. Targets:
- Fat Man: 0.00 - 1.00
- Shape Alistair: 0.00 - 1.00
- Shape Daveth: 0.00 - 1.00
- Shape Duncan: 0.00 - 1.00
- Shape Jory: 0.00 - 1.00
- Shape King Cailan: 0.00 - 1.00
- Shape Loghain: 0.00 - 1.00
- Shape Old Male: 0.00 - 1.00
Reset
- (Left clicking in box to right resets all selections to 0.00)
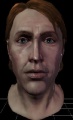
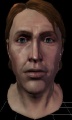
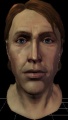
Tints and hairstyles
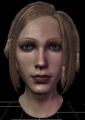
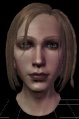
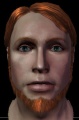
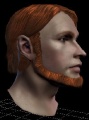
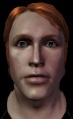
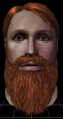
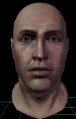
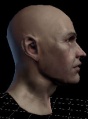
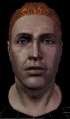
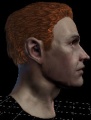
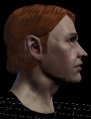
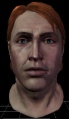
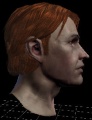
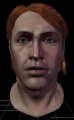
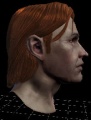
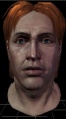
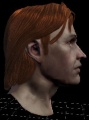
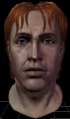
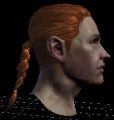
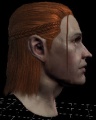
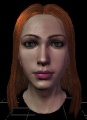
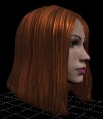
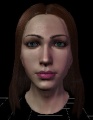
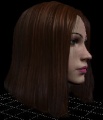
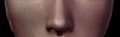
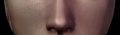
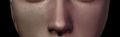
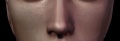
Tints and hairstyles often have somewhat uninformative names. The following thumbnails provide a preview summary of what these tints and hairstyles represent:
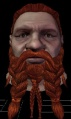
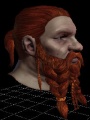
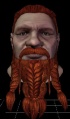
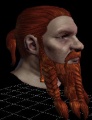
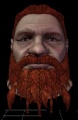
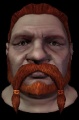
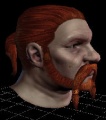
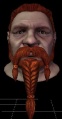
Dwarf male beards
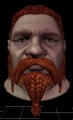
dm_brd_b1a_0 front
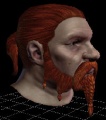
dm_brd_b1a_0 side
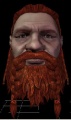
dm_brd_b2a_0 front
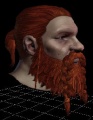
dm_brd_b2a_0 side
dm_brd_b3a_0 front
dm_brd_b3a_0 side
dm_brd_b4a_0 front
dm_brd_b4a_0 side
dm_brd_b5a_0 front

dm_brd_b5a_0 side
dm_brd_b6a_0 front
dm_brd_b6a_0 side
dm_brd_b7a_0 front
dm_brd_b7a_0 side


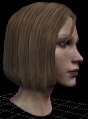
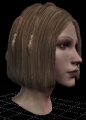
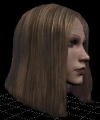
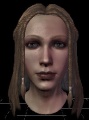
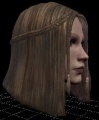
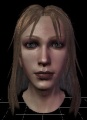
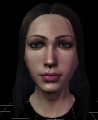
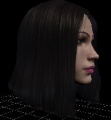
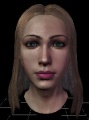
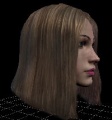
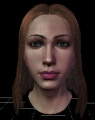
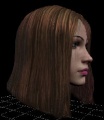
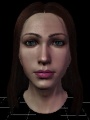
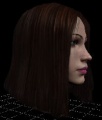
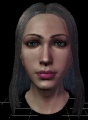
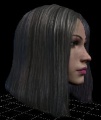
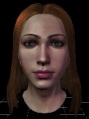
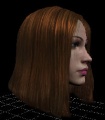
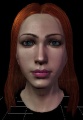
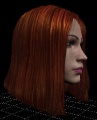
Human female hairstyles
hf_har_blda_0 front
hf_har_blda_0 side
hf_har_ha1a_0 front
hf_har_ha1a_0 side
hf_har_ha2a_0 front
hf_har_ha2a_0 side
hf_har_ha3a_0 front
hf_har_ha3a_0 side
hf_har_ha4a_0 front
hf_har_ha4a_0 side
hf_har_hb1a_0 front
hf_har_hb1a_0 side
hf_har_hb2a_0 front
hf_har_hb2a_0 side
hf_har_hb3a_0 front
hf_har_hb3a_0 side
hf_har_hb4a_0 front
hf_har_hb4a_0 side
hf_har_hc1a_0 front
hf_har_hc1a_0 side
hf_har_hc2a_0 front
hf_har_hc2a_0 side
hf_har_hc3a_0 front
hf_har_hc3a_0 side
hf_har_hc4a_0 front
hf_har_hc4a_0 side
hf_har_hd1a_0 front
hf_har_hd1a_0 side
hf_har_hd2a_0 front

hf_har_hd2a_0 side
hf_har_hd3a_0 front
hf_har_hd3a_0 side
hf_har_hd4a_0 front
hf_har_hd4a_0 side


hf_har_mora_0 - Morrigan's hairstyle
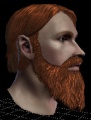
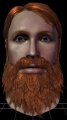
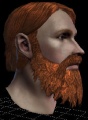
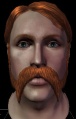
Human male beards
hm_brd_b1a_0 front
hm_brd_b1a_0 side
hm_brd_b2a_0 front
hm_brd_b2a_0 side
hm_brd_b3a_0 front

hm_brd_b3a_0 side
hm_brd_b4a_0 front
hm_brd_b4a_0 side
hm_brd_b5a_0 front
hm_brd_b5a_0 side
hm_brd_b6a_0 front

hm_brd_b6a_0 side


Human male hairstyles
hm_har_blda_0 front
hm_har_blda_0 side
hm_har_ha1a_0 front
hm_har_ha1a_0 side
hm_har_ha2a_0 front

hm_har_ha2a_0 side
hm_har_ha3a_0 front
hm_har_ha3a_0 side
hm_har_hb1a_0 front
hm_har_hb1a_0 side
hm_har_hb2a_0 front
hm_har_hb2a_0 side
hm_har_hb3a_0 front
hm_har_hb3a_0 side
hm_har_hb4a_0 front
hm_har_hb4a_0 side
hm_har_hc1a_0 front
hm_har_hc1a_0 side
hm_har_hc2a_0 front
hm_har_hc2a_0 side
hm_har_hc3a_0 front
hm_har_hc3a_0 side
hm_har_hc4a_0 front
hm_har_hc4a_0 side

hm_har_hd1a_0 front
hm_har_hd1a_0 side
hm_har_hd2a_0 front
hm_har_hd2a_0 side
hm_har_hd3a_0 front
hm_har_hd3a_0 side
hm_har_hd4a_0 front

hm_har_hd4a_0 side


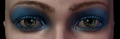
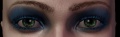
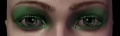
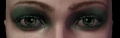
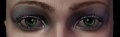
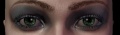
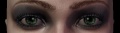
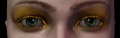
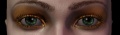
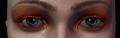
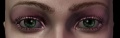
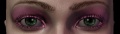
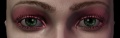
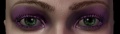
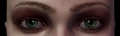
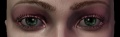
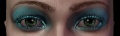
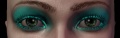
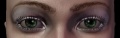
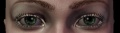
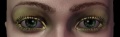
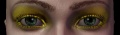
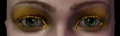
Eye shadow
t1_mue_bk1
t1_mue_bk2
t1_mue_bk3
t1_mue_bl1
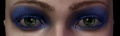
t1_mue_bl2
t1_mue_bl3
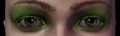
t1_mue_gn1
t1_mue_gn2
t1_mue_gn3
t1_mue_gr1
t1_mue_gr2
t1_mue_gr3
t1_mue_or1
t1_mue_or2
t1_mue_or3
t1_mue_pi1
t1_mue_pi2
t1_mue_pi3
t1_mue_pu1
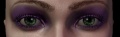
t1_mue_pu2
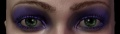
t1_mue_pu3
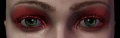
t1_mue_re1
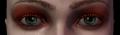
t1_mue_re2
t1_mue_re3
t1_mue_ro1

t1_mue_ro2

t1_mue_ro3
t1_mue_te1

t1_mue_te2
t1_mue_te3
t1_mue_wh1
t1_mue_wh2

t1_mue_wh3
t1_mue_ye1
t1_mue_ye2
t1_mue_ye3
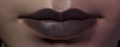
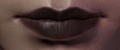
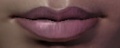
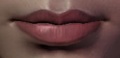
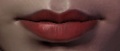
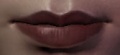
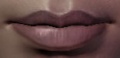
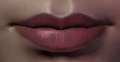
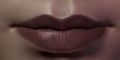
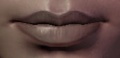
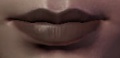
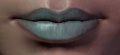
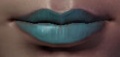
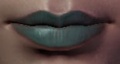
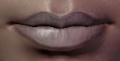
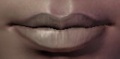
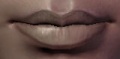
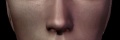
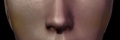
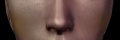
Lip colour

t1_mul_bk1
t1_mul_bk2
t1_mul_bk3
t1_mul_pi1
t1_mul_pi2
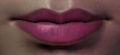
t1_mul_pi3
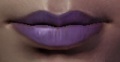
t1_mul_pu1
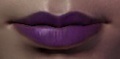
t1_mul_pu2

t1_mul_pu3

t1_mul_re1
t1_mul_re2
t1_mul_re3
t1_mul_ro1
t1_mul_ro2
t1_mul_ro3
t1_mul_ta1

t1_mul_ta2
t1_mul_ta3
t1_mul_te1
t1_mul_te2
t1_mul_te3
t1_mul_wh1
t1_mul_wh2
t1_mul_wh3


Skin tone
t1_skn_001
t1_skn_002
t1_skn_003
t1_skn_004
t1_skn_005
t1_skn_006
t1_skn_007
t1_skn_blank


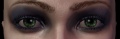
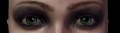
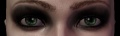
Eye colour
t3_eye_amb
t3_eye_blk
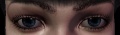
t3_eye_dbl
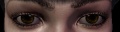
t3_eye_dbr
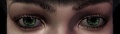
t3_eye_grn
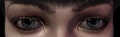
t3_eye_gry
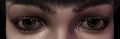
t3_eye_hzl
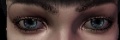
t3_eye_ice
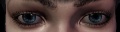
t3_eye_lbl
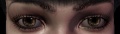
t3_eye_lbr
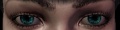
t3_eye_tea
Hair colour
t3_har_blk front
t3_har_blk side
t3_har_bln front
t3_har_bln side
t3_har_dbl front
t3_har_dbl side
t3_har_dbr front
t3_har_dbr side
t3_har_gry front
t3_har_gry side
t3_har_lbr front
t3_har_lbr side
t3_har_org front
t3_har_org side
t3_har_rbr front
t3_har_rbr side
t3_har_red front
t3_har_red side
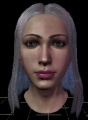
t3_har_wht front
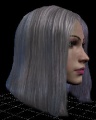
t3_har_wht side


Blush colour
t1_mub_bk1
t1_mub_bk2
t1_mub_bk3
t1_mub_br1
t1_mub_br2
t1_mub_br3
t1_mub_or1
t1_mub_or2
t1_mub_or3
t1_mub_pi1
t1_mub_pi2
t1_mub_pi3
t1_mub_pu1
t1_mub_pu2
t1_mub_pu3
t1_mub_re1
t1_mub_re2
t1_mub_re3
t1_mub_ro1
t1_mub_ro2
t1_mub_ro3
t1_mub_ta1
t1_mub_ta2
t1_mub_ta3
t1_mub_te1
t1_mub_te2
t1_mub_te3
t1_mub_wh1
t1_mub_wh2
t1_mub_wh3
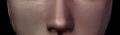
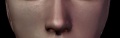
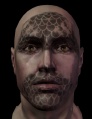
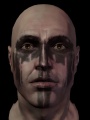
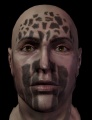
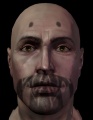
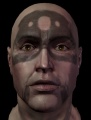
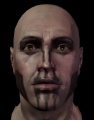
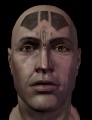
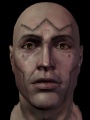
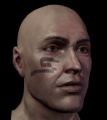
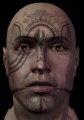
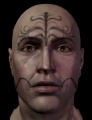
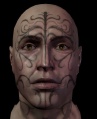
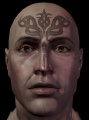
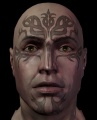
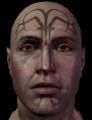
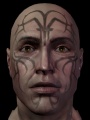
Tattoos
| Tint file | Colour |
|---|---|
| t1_tat_blk | Black |
| t1_tat_dgn | Dark Green |
| t1_tat_org | Orange |
| t1_tat_blu | Blue |
| t1_tat_dpu | Dark Purple |
| t1_tat_pnk | Pink |
| t1_tat_brn | Brown |
| t1_tat_drd | Dark Red |
| t1_tat_pur | Purple |
| t1_tat_dbl | Dark Blue |
| t1_tat_grn | Green |
| t1_tat_red | Red |
| t1_tat_dbr | Dark Brown |
| t1_tat_gry | Grey |
| t1_tat_yel | Yellow |
You can use a different colour for each Tattoo layer.
You can combine (layer) Tattoos 1 to 4 for each Tattoo mask if desired.
Sliders 0.00 to 1.00 determines darkness of the Tattoo.
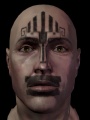
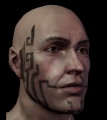
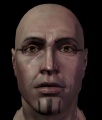
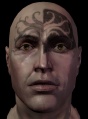
All screen shots set at 1.00, black colour
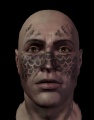
uh tat av1 0t tattoo 1
uh tat av1 0t tattoo 2
uh tat av1 0t tattoo 3
uh tat av1 0t tattoo 4
uh tat av2 0t tattoo 1
uh tat av2 0t tattoo 2
uh tat av2 0t tattoo 3
uh tat av2 0t tattoo 4

uh tat av3 0t tattoo 1
uh tat av3 0t tattoo 2
uh tat av3 0t tattoo 3

uh tat av3 0t tattoo 4
uh tat dw1 0t tattoo 1
uh tat dw1 0t tattoo 2
uh tat dw1 0t tattoo 3
uh tat dw1 0t tattoo 4
uh tat dw2 0t tattoo 1
uh tat dw2 0t tattoo 2
uh tat dw2 0t tattoo 3

uh tat dw2 0t tattoo 4
uh tat ed1 0t tattoo 1
uh tat ed1 0t tattoo 2
uh tat ed1 0t tattoo 3
uh tat ed1 0t tattoo 4
uh tat ed2 0t tattoo 1
uh tat ed2 0t tattoo 2
uh tat ed2 0t tattoo 3
uh tat ed2 0t tattoo 4
uh tat ed3 0t tattoo 1
uh tat ed3 0t tattoo 2
uh tat ed3 0t tattoo 3
uh tat ed3 0t tattoo 4
uh tat ed4 0t tattoo 1
uh tat ed4 0t tattoo 2
uh tat ed4 0t tattoo 3
uh tat ed4 0t tattoo 4


